Monday, April 30, 2012

Designing of a CCTV System

Designing a CCTV System

Design Requirements
Before any camera, lens, cable or monitor is selected for a CCTV application, a designer must ask three basic questions:
What is the system's function — what is it being designed to accomplish, and will the system be integrated into other systems, i.e. access control system?
Who will manage the system and how?
Is the system new, or is it an upgrade (retrofit) of an existing system?
We will address each of these below.
1. System Function
2. System Management
3. Designing a CCTV System


System Function
Its depends some things like, "depending on the specific purpose of the CCTV system."Determining that purpose is a crucial component of the initial phase of designing any CCTV system.
There's a familiar saying among designers: Form follows function — that is, the form something takes is shaped by its purpose and usage. This form of a CCTV system —
the specific camera and lenses selected,
the mounts and enclosures,
the transmission mediums used,
the monitors, switching devices and recorders
 — all depends on the system's function. In the world of CCTV security systems, there are three basic functions, based upon what the customer wants to see:
detection (alert operator that something is happening)
recognition (allow operator to determine what is happening)
identification (show operator who is involved)

As you can see, there is a priority to these three functions. Detection is the least demanding, recognition is more demanding, and identification places the most demands on the system and the operators. It is not surprising, then, that the design criteria are similarly prioritized. In systems (or subsystems) with detection as the primary focus, there are low design criteria, that is, the demands on the equipment are not as great. Recognition is said to have medium design criteria.
Identification — seeing someone "up close and personal" — requires high design criteria.

System Function
Suppose a designer is planning a CCTV installation at a bank. Security personnel must be able to observe several areas, among them: the entrance, the lobby area, and the teller windows. At the entrance, operators simply want to know that someone is coming into the building (detection). For the purposes of this example, a camera with a fixed focal length lens viewable on a monitor is all that is needed (low design criteria). Once in the lobby area, the operators will want to determine where the subjects are, and what they are doing (recognition). A camera equipped with a remote positioning device and medium range zoom lens is required (medium designer criteria).

Finally, at the teller's windows, it is essential for security personnel to positively identify the subjects (identification). Here the requirement is for an overt, in plain view subsystem which includes a lens with high magnification, attached to a camera with remote control, carefully positioned to afford a uninterrupted view of the subject in even, adequate lighting (high design criteria).
(Note: the Federal Bank Security Act requires teller windows to have a fixed camera, in plain view that captures the teller and person at the teller window.)
In addition to the items presented in the example, the design criteria will evolve to include specifications for monitors. A small monochrome monitor may be sufficient for detection, but a large color monitor with good resolution may be the ideal for identification.


System Management
As a designer begins the task of planning a CCTV system, several policy and personnel issues come into play. Asking the right questions (and getting the right answers) as well as guiding the customer, will help identify the policies and personnel requirements for the system which, in turn, helps define system parameters.
These questions include:
Who will operate the system?
What are the criteria for controlling the system?
What are the recording criteria?
Why are they recordings being made?
How long will the recordings are archived?
What do you want to see and for what purpose?
What limitations do you have, legal and financial?

The answers to the above questions can ensure the recommended CCTV system meets important operating criteria for the customer.
Who will operate the system: Will the operators be direct company-hired personnel or contractor-supplied?
Historically, contractor personnel tend to change more often than company staff members. Experience suggests that company personnel — with greater longevity on the job — can generally handle more complexity in a system than contract workers.

The response to the first questions impacts on the answer to the second question: what are the criteria for controlling the system? CCTV system controls can be fully automatic (computer based operation with programmed sequencing of camera activity, etc.); completely operator-controlled (manual switching, directing outputs, etc.); or a combination of the two. The skill levels of operators may suggest the optimum level of automation for the system.

Now we shift to policy issues. What are the recording criteria? For example, is real time recording of event critical? How about time-lapse recording? Will video be multiplexed? Do you need a demultiplexer for individual camera viewing? If you signal is exposed to potential outside interception, do you want the signal to be recorded to be encoded and then decoded for playback control? Is there a requirement to store images on computer disk as well as video tape?

Why are the recordings being made? Are images being stored simply for administrative purposes — for use by company personnel only? Or will the stored images possibly be used as evidence in possibly litigation?
Finally, how long will the recordings are archived? Long term archiving suggests the need for a storage area which has environmental controls to preserve the tape (as well as space enough to contain the volume of tapes accumulated over the years). Answers to these questions will impact on the type of equipment selected and even the basic design of the system infrastructure.

Designing a CCTV System

New Construction or Retrofit:
Designing a CCTV system can be a lot like house construction. It is often easier to design and proceed with all new construction instead of integrating new components into existing systems. Whether the project is new construction or upgrading (retrofitting) an existing system, several fundamental issues must be addressed prior to the installation process. Answers to the following questions will provide valuable information:
Will other systems (e.g., access control) be integrated with the CCTV System?
What transmission mediums will be used?
What is the project budget? Has it been planned, committed and
Approved?
What are future system requirements regarding upgrades?
Will application requirements change in the future?

Each of these questions helps the designer to define a system that meets the customer’s needs for the present and the future.
Will the CCTV system be integrated with other systems? Will the CCTV system need to supply information regarding access control or other systems? What level of integration is required? If there is an existing CCTV system, are there component compatibility issues that must be addressed? What is the most efficient and cost-effective transmission medium for the system? If an existing CCTV system is being upgraded or supplemented, what is the existing transmission medium, and should the upgrade include changes to the existing transmission medium? What is the project budget? In a sense, the answer to this question can define many of the design elements for a CCTV project. There are obviously many ways to proceed while satisfying any budgetary restrictions. The basic options are to reduce the number of components (and therefore coverage) or use components with fewer capabilities or lower quality, e.g., monochrome cameras instead of color, or a camera with generally lower specs (resolution, sensitivity, S/N) as long as the component will still provide the performance required for the application. Also, how was the budget determined? Is it based on sound preliminary research or a "guesstimate?" Have the decision makers committed to it and has it been approved? Does the option exist to review the budget or is the designer locked into the approved amount?
Designing a New System
What are the requirements for future upgrades? As newer technologies become available, is the customer's expectation that these will be incorporated into the system design. Is there a planned migration path to accomplish this?
Related to this last question is another: will application requirements be changed in the future? Will enhanced functionality be required at a later date? That is, will the function of the CCTV surveillance system or the overall security system change in the future?
For example, is the company planning to expand its facilities locally or even remotely? Consider a commercial laboratory that is planning to move into new markets within the next five years. The new business will demand new levels of access control and CCTV coverage. Being aware of that future requirement can impact decisions regarding the current decision. Answers to all of the above questions sets a baseline for CCTV system design. These are primary issues. Secondary issues are the "nuts and bolts" aspects of system design, and careful attention to these primary questions will automatically define many of the hardware issues.

A carefully designed CCTV surveillance system will ensure:
  1. adequate coverage
  2. Extendability for future additions and enhancements.
  3. Satisfied customers.
Installation Tools & Techniques
All cameras need to be powered and have a way to get the video signal back to the monitor and recorder. The most reliable way to achieve this is to "hardwire" your camera system. Some camera locations may require 
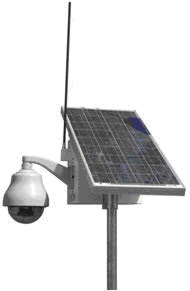
wireless transmission of the video signal but you should avoid using wireless if possible. Wireless is best suited for temporary surveillance applications.
Video/power cable can be purchase pre-made in specific lengths like 25m, 50m etc. It can also be purchased in bulk rolls of 500m or 1000m that can be made to custom lengths.

Although using pre made cables is perfectly acceptable there are drawbacks over making your own. With pre made cables, the connectors are already on the wire so you have to drill a larger hole to pull the wire through an opening.

You may also have excess wire to deal with. This is especially bad when it's on the monitor end. Making custom cables makes for a neater installation and costs less per foot/ meter.

If you decide to make your own cables you will need some specialized tools. One is a wire stripper, the other is a crimper. You will use these to prepare your cable for "BNC" connectors. Using these industry standard connectors will insure that your wiring is compatible with most cameras on the market. It also allows you to replace or upgrade your cameras at a later date with out having to rewire your system.

Most installations require that you hide your wiring as much as possible. You can do so by "fishing" the wire through your walls & ceilings. We first drill a 3/4 inch hole in the top wall plate as well as where you will be mounting the camera.

This size hole will allow you to use the pre-made cables or the custom made cables. We insert small flexible fiberglass rods into one hole and try to push it out the other end.
They come in 6' lengths and can be combined with other rods. This is especially helpful when pulling wire over long distances like a drop ceiling.
Once the rod is sticking out the other end, attach your video cable to it and pull the wire out until about 18" is sticking out. You'll have plenty of wire to work with.
Another type of wall fishing tool is called a fish tape. It is a long metal wire that is wrapping onto a spool. You simply pull out a small amount and feed it into your hole. Keep pulling and feeding it until you can attach your video cable to it.

Individual transformers or a power distribution panel can power you camera system. For neater installations especially for systems with more than 4 cameras use a power distribution panel. A power strip with 8 outlets fills up rather quickly when you also plug in the monitor, recorder and 4 transformers.

Monday, April 23, 2012

Why Solar ?


In the long term, solar energy is the best answer to the greenhouse effect. Solar energy is CO2 free and virtually inexhaustible. According to the International Energy Agency (IEA), at present, solar energy constitutes a mere 0.04% of worldwide energy consumption whereas fossil fuels feed over 80% of the world energy supply. However, some key facts on solar energy highlight its significant potential:
  • Two billion people in the world have no access to electricity. For most of them, solar energy would be their cheapest electricity source, but they cannot afford it.
  • Unlike fossil fuels, which produce significant amounts of pollution and enormous amounts of greenhouse gases, the sun's energy is clean and its supply virtually limitless.
  • In just one hour, the Earth receives more energy from the sun than human beings consume during an entire year.
  • According to America's Department of Energy, solar panels could, if placed on about 0.5% of USA’s mainland landmass, provide for all of its current electricity needs.
  • The Sun has sufficient helium mass to provide the Earth with energy for another five billion years and, every 15 minutes, it emits more energy than humankind uses in an entire year.
  • The Earth receives only one half of one billionth of the Sun's radiant energy, but in just a few days it gets as much heat and light as could be produced by burning all the oil, coal and wood on the planet.
In addition to the dramatic benefits to reducing global warming, harnessing solar power can reap significant benefits for individuals and businesses alike. For example, businesses can use solar energy to:
  • Reduce the risk of volatile and rising fossil fuel prices, thereby reducing or stabilizing operating costs, particularly as governments move to tax carbon emissions.
  • Take advantage of government incentives and rebates which are designed to increase the use of renewable energy sources.
  • Reduce the risk and cost of power outages and backup power systems.
  • Strengthen relationships with key stakeholders such as customers and the community, by demonstrating sensitivity to climate change issues.
Solar panels absorb sunlight through their silicon membrane and turn the energy absorbed into useable power.

You have probably also been hearing about the "solar revolution" for the last 22 years -- the idea that one day we will all use free electricity from the sun. This is a seductive promise: On a bright, sunny day, the sun shines approximately 1,000 watts of energy per square meter of the planet's surface, and if we could collect all of that energy we could easily power our homes and offices for free.
In this article, we will examine solar cells to learn how they convert the sun's energy directly into electricity. In the process, you will learn why we are getting closer to using the sun's energy on a daily basis, and why we still have more research to do before the process becomes cost effective.

Photovoltaic Cells: Converting Photons to Electrons

The solar cells that you see on calculators and satellites are photovoltaic cells or modules (modules are simply a group of cells electrically connected and packaged in one frame). Photovoltaic’s, as the word implies (photo = light, voltaic = electricity), convert sunlight directly into electricity. Once used almost exclusively in space, Photovoltaic’s are used more and more in less exotic ways. They could even power your house.

How do these devices work?
Photovoltaic (PV) cells are made of special materials called semiconductors such as silicon, which is currently the most commonly used. Basically, when light strikes the cell, a certain portion of it is absorbed within the semiconductor material. This means that the energy of the absorbed light is transferred to the semiconductor. The energy knocks electrons loose, allowing them to flow freely.

PV cells also all have one or more electric fields that act to force electrons freed by light absorption to flow in a certain direction. This flow of electrons is a current, and by placing metal contacts on the top and bottom of the PV cell, we can draw that current off to use externally. For example, the current can power a calculator. This current, together with the cell's voltage (which is a result of its built-in electric field or fields), defines the power (or wattage) that the solar cell can produce.

That's the basic process, but there's really much more to it. Let's take a deeper look into one example of a PV cell: the single-crystal silicon cell.

How Silicon Makes a Solar Cell

Silicon has some special chemical properties, especially in its crystalline form. An atom of silicon has 14 electrons, arranged in three different shells. The first two shells, those closest to the center, are completely full. The outer shell, however, is only half full, having only four electrons. A silicon atom will always look for ways to fill up its last shell (which would like to have eight electrons). To do this, it will share electrons with four of its neighbor silicon atoms. It's like every atom holds hands with its neighbors, except that in this case, each atom has four hands joined to four neighbors. That's what forms the crystalline structure, and that structure turns out to be important to this type of PV cell.
We've now described pure, crystalline silicon. Pure silicon is a poor conductor of electricity because none of its electrons are free to move about, as electrons are in good conductors such as copper. Instead, the electrons are all locked in the crystalline structure. The silicon in a solar cell is modified slightly so that it will work as a solar cell.
A solar cell has silicon with impurities -- other atoms mixed in with the silicon atoms, changing the way things work a bit. We usually think of impurities as something undesirable, but in our case, our cell wouldn't work without them. These impurities are actually put there on purpose. Consider silicon with an atom of phosphorous here and there, maybe one for every million silicon atoms.
Phosphorous has five electrons in its outer shell, not four. It still bonds with its silicon neighbor atoms, but in a sense, the phosphorous has one electron that doesn't have anyone to hold hands with. It doesn't form part of a bond, but there is a positive proton in the phosphorous nucleus holding it in place.
When energy is added to pure silicon, for example in the form of heat, it can cause a few electrons to break free of their bonds and leave their atoms. A hole is left behind in each case. These electrons then wander randomly around the crystalline lattice looking for another hole to fall into. These electrons are called free carriers, and can carry electrical current.

There are so few of them in pure silicon, however, that they aren't very useful. Our impure silicon with phosphorous atoms mixed in is a different story. It turns out that it takes a lot less energy to knock loose one of our "extra" phosphorous electrons because they aren't tied up in a bond -- their neighbors aren't holding them back. As a result, most of these electrons do break free, and we have a lot more free carriers than we would have in pure silicon. The process of adding impurities on purpose is called doping, and when doped with phosphorous, the resulting silicon is called N-type ("n" for negative) because of the prevalence of free electrons. N-type doped silicon is a much better conductor than pure silicon is.
Actually, only part of our solar cell is N-type. The other part is doped with boron, which has only three electrons in its outer shell instead of four, to become P-type silicon. Instead of having free electrons, P-type silicon ("p" for positive) has free holes. Holes really are just the absence of electrons, so they carry the opposite (positive) charge. They move around just like electrons do.
The interesting part starts when you put N-type silicon together with P-type silicon. Remember that every PV cell has at least one electric field. Without an electric field, the cell wouldn't work, and this field forms when the N-type and P-type silicon are in contact. Suddenly, the free electrons in the N side, which have been looking all over for holes to fall into, see all the free holes on the P side, and there's a mad rush to fill them in.

Anatomy of a Solar Cell


Solar energy is renewable energy for humans. It's also clean energy, do not generate any environmental pollution. Solar photovoltaic (PV) was the most watched item in the researching of solar energy utilize.
Solar PV Panel
The production of solar cells based on semiconductor materials, and its working principle is photovoltaic materials photoelectron conversion reaction after absorb light energy, according to different materials, solar cells can be divided into: 
1, silicon solar cells; 
2 multi-material cells using inorganic salts such as gallium arsenide III-V compounds, cadmium sulfide, copper indium selenium compounds; 
3, polymer materials solar cells; 
4, nano-crystalline solar cells. 

etc.


1.Silicon solar cells
Silicon solar cell's structure and working principle,
Solar cells' elements is the photoelectric effect of semiconductors, normally simiconductors have below structure:
Solar Cell
 As shown in the picture, 
positive charge(+) means silicon atom, 
negtive charge(-) means electron around the silicon atom.


A hole will exist in the crystalline silicon when the 
cyrstalline silicon mixed with boron, 


it's shape as below picture:


Silicon Crystalline

 In the picture, Positive charge (+) means silicon atom, Negetive charge(-) means electron around the silicon atom. and the yellow means mixed boron atom, as only 3 electron around the boron atom, it's bring the hole as in blue, this hole is unstable as it's without electron, easily absorb electron to neutralize to be a P(positive) type semiconductor.

Sameness, when mixed with phosphor atom, it's become highly active as the phosphor atom have 5 electron, it's comes the N(negative) type semiconductor. as shown in below picture, the yellow means Phosphor atom, the red means superfluous electron.

yellow means Phosphor atom, the red means superfluous electron.

N type semiconductor contains more hole, while the P type semiconductor contains more electron, in this way, the electric potential difference will be formed when the P and N type semiconductor combine, that comes the PN junction.


When the P and N-type semiconductor combine, the two types of semiconductors at the interface region will form a special thin-layer, the P side contains negative electron, N side contains positive electron. This is because P-type semiconductor have many hole, N-type semiconductor have many free electrons. Electron from N-zone will be spread to the P-zone, hole from the P-zone will spread to the N-zone.

When the lights reach the crystalline silicon, the hole from N-type semiconductor move to P zone, and electron from P-zone move to N-zone, that formed the electric current from N-zone to P-zone, then formed the electric potential difference, that comes the electricity source. (shown in below picture)
Because the semiconductor is not a good conductor of electricity, the electron will waste very much when passed the P-N junction and flow in semiconductor as it's large resistance. However, if painted a metal upper, sunlight can not going through, electric current will not be able to produce, so in general with a metal mesh covering the p-n junction, in order to increase the size of the incident light.

In addition, the silicon surface is very bright, will reflect many of the sun lights, could not be used by the solar cells. Therefore, scientists painted it with a very small reflectance film, to decrease the sunlight reflection loss below 5% or eve less. A single solar cell can provide only a limited current and voltage, so people join many pieces of solar cells (usually 36) in parallel or series to become the solar modules.


2. Crystalline silicon solar cell manufacturing process.

Usual crystalline silicon solar cells are made up from the high-quality silicon at thickness of 350 ~ 450μm, such silicon wafers are cutted from Czochralski or casted silicon ingot
The above method consum more silicon material. In order to save materials, the current preparation of polycrystalline silicon thin-film solar cells using chemical vapor deposition method, including low pressure chemical vapor deposition (LPCVD) and plasma enhanced chemical vapor deposition (PECVD) process. In addition, liquid phase epitaxy (LPPE) and sputtering deposition method can also be used to prepare poly-silicon thin-film battery.
Chemical vapor deposition mainly the SiH2Cl2, SiHCl3, SiCl4 or SiH4, as the reaction gas, It's react at a certain protection atmosphere and deposit silicon atoms at the heated substrate, the general substrate materials are Si, SiO2, Si3N4, etc.. But the researching found that it's difficult to form the large crystal on the amorphous silicon (a-si) substrates and easy to cause interspace between crystal. Solutions for this problem is to deposited a thin layer of amorphous silicon on the substrate by LPCVD, then annealing this layer of amorphous silicon, to get larger crystal, and then deposited a more thick poly-crystalline silicon film at this layer, therefore, re-crystallization technology is no doubt a very important aspect, the current technology used is solid-phase crystallization and recrystallization in the FZ method. Poly-silicon thin-film solar cells not onlyi use the re-crystallization process, also used almost all of the mono-crystalline silicon solar cells preparation technology, the solar cells made by this way have a remarkably increased it's conversion efficiency.


3. Nanocrystalline chemistry solar cell
Silicon solar cells are undoubtedly the most sophisticated atom all solar cells, but because of its high cost, can not meet the requirements of large-scale application. Therefore, Peoples always explore in process, new material and thin film solar cells etc, among this, the newly developed nano TiO2 crystalline chemistry solar cells get a great importance from home and abroad scientists.
For example, the dye-sensitized nano-crystalline solar cell (DSSCs), such solar cells mainly includes a glass substrate deposited with trasparent conductive film, dye-sensitized semiconductor materials, electrode and electrolyte etc.
As shown in below picture, the white ball means TiO2, red ball means dye molecules. Dye molecules transite to excited state after absorb solar energy, excited state unstable, the electron rapidly injected into the nearby TiO2 conduction band, Dye lost the electron is quickly be compensated from the electrolyte, electron enter the conduction band of TiO2 and eventually enter the electric conductive film, and then through the outer loop photo-current generated.

Nano-crystallineTiO2 solar cells have it's advantages of cheap cost, simple production process and a stable performance. Photoelectric efficiency stability at 10%, and the production costs is only 1 / 5 ~ 1 / 10 of silicon solar cells. Life expectancy can achieve more than 20 years. However, because of such a solar cell researching and development still in its infancy, it is estimated to be in the market gradually.


Anode: dye-sensitized semi-conductive thin film ( TiO2 film)
Cathode: TCO glass deposted with platinic
Electrolyte: I3-/I-


How do solar panels work?
Solar panels collect solar radiation from the sun and actively convert that energy to electricity. From a solar-powered calculator to an international space station, solar panels generate electricity using the same principles of electronics as chemical batteries or standard electrical outlets. With solar panels, it's all about the free flow of electrons through a circuit.
To understand how solar panels generate electrical power, it might help to take a quick trip back to high school chemistry class. The basic element of solar panels is the same element that helped create the computer revolution -- pure silicon. When silicon is stripped of all impurities, it makes a ideal neutral platform for the transmission of electrons. Silicon also has some atomic-level properties which make it even more attractive for the creation of solar panels.
Solar CCTV System

Silicon atoms have room for eight electrons in their outer bands, but only carry four in their natural state. This means there is room for four more electrons. If one silicon atom contacts another silicon atom, each receives the other atom's four electrons. This creates a strong bond, but there is no positive or negative charge because the eight electrons satisfy the atoms' needs. Silicon atoms can combine for years to result in a large piece of pure silicon. This material is used to form the plates of solar panels.

Here's where science enters the picture. Two plates of pure silicon would not generate electricity in solar panels, because they have no positive or negative charge. Solar panels are created by combining silicon with other elements that do have positive or negative charges.
Phosphorus, for example, has five electrons to offer to other atoms. If silicon and phosphorus are combined chemically, the result is a stable eight electrons with an additional free electron along for the ride. It can\'t leave, because it is bonded to the other phosphorus atoms, but it isn't needed by the silicon. Therefore, this new silicon/phosphorus plate is considered to be negatively charged.
In order for electricity to flow, a positive charge must also be created. This is achieved in solar panels by combining silicon with an element such as boron, which only has three electrons to offer. A silicon/boron plate still has one spot left for another electron. This means the plate has a positive charge. The two plates are sandwiched together in solar panels, with conductive wires running between them.
With the two plates in place, it's now time to bring in the 'solar' aspect of solar panels. Natural sunlight sends out many different particles of energy, but the one we're most interested in is called a photon. A photon essentially acts like a moving hammer. When the negative plates of solar cells are pointed at a proper angle to the sun, photons bombard the silicon/phosphorus atoms.
Eventually, the 9th electron, which wants to be free anyway, is knocked off the outer ring. This electron doesn't remain free for long, since the positive silicon/boron plate draws it into the open spot on its own outer band. As the sun's photons break off more electrons, electricity is generated. The electricity generated by one solar cell is not very impressive, but when all of the conductive wires draw the free electrons away from the plates, there is enough electricity to power low amperage motors or other electronics. Whatever electrons are not used or lost to the air are returned to the negative plate and the entire process begins again.


One of the main problems with using solar panels is the small amount of electricity they generate compared to their size. A calculator might only require a single solar cell, but a solar-powered car would require several thousand. If the angle of the solar panels is changed even slightly, the efficiency can drop 50 percent.
Some power from solar panels can be stored in chemical batteries, but there usually isn't much excess power in the first place. The same sunlight that provides photons also provides more destructive ultraviolet and infrared waves, which eventually cause the panels to degrade physically. The panels must also be exposed to destructive weather elements, which can also seriously affect efficiency.
Many sources also refer to solar panels as photovoltaic cells, which references the importance of light (photos) in the generation of electrical voltage
The challenge for future scientists will be to create more efficient solar panels are small enough for practical applications and powerful enough to create excess energy for times when sunlight is not available.

Energy Loss in a Solar Cell
Visible light is only part of the electromagnetic spectrum. Electromagnetic radiation is not monochromatic -- it is made up of a range of different wavelengths, and therefore energy levels. Light can be separated into different wavelengths, and we can see them in the form of a rainbow. Since the light that hits our cell has photons of a wide range of energies, it turns out that some of them won't have enough energy to form an electron-hole pair. They'll simply pass through the cell as if it were transparent. Still other photons have too much energy. Only a certain amount of energy, measured in electron volts (eV) and defined by our cell material (about 1.1 eV for crystalline silicon), is required to knock an electron loose. We call this the band gap energy of a material.
If a photon has more energy than the required amount, then the extra energy is lost (unless a photon has twice the required energy, and can create more than one electron-hole pair, but this effect is not significant). These two effects alone account for the loss of around 70 percent of the radiation energy incident on our cell.
Why can't we choose a material with a really low band gap, so we can use more of the photons? Unfortunately, our band gap also determines the strength (voltage) of our electric field, and if it's too low, then what we make up in extra current (by absorbing more photons), we lose by having a small voltage. Remember that power is voltage times current. The optimal band gap, balancing these two effects, is around 1.4 eV for a cell made from a single material.
Speed Dome with Solar
We have other losses as well. Our electrons have to flow from one side of the cell to the other through an external circuit. We can cover the bottom with a metal, allowing for good conduction, but if we completely cover the top, then photons can't get through the opaque conductor and we lose all of our current (in some cells, transparent conductors are used on the top surface, but not in all). If we put our contacts only at the sides of our cell, then the electrons have to travel an extremely long distance (for an electron) to reach the contacts.

Remember, silicon is a semiconductor -- it's not nearly as good as a metal for transporting current. Its internal resistance (called series resistance) is fairly high, and high resistance means high losses. To minimize these losses, our cell is covered by a metallic contact grid that shortens the distance that electrons have to travel while covering only a small part of the cell surface. Even so, some photons are blocked by the grid, which can't be too small or else its own resistance will be too high.

Wednesday, April 18, 2012

Stand-Alone Power System Design Procedure for CCTV System

What would you have to do to power your equipment with solar energy? Although it's not as simple as just slapping some modules on your equipment, it's not extremely difficult to do either, but will require calculations.

First of all, not every location has the correct orientation or angle of inclination to take advantage of the suns energy. Non-tracking PV systems in the Northern Hemisphere should point toward true south (this is the orientation). They should be inclined at an angle equal to the area's latitude to absorb the maximum amount of energy year-round. A different orientation and/or inclination could be used if you want to maximize energy production for the morning or afternoon, and/or the summer or winter. Of course, the modules should never be shaded by nearby trees or buildings, no matter the time of day or the time of year. In a PV module, even if just one of its 36 cells is shaded, power production will be reduced by more than half.

If you have a location with an un-shaded, south-facing orientation, you need to decide what size system you need. This is complicated by the facts that your electricity production depends on the weather, which is never completely predictable, and that your electricity demand will also vary.

These hurdles are fairly easy to clear. Meteorological data gives average monthly sunlight levels for different geographical areas. This takes into account rainfall and cloudy days, as well as altitude, humidity, and other more subtle factors. You should design for the worst month, so that you'll have enough electricity all year. With that data, and knowing your equipments power requirement (you must add together the power requirements of all equipment you intend to power with your solar system), there are simple methods you can use to determine just how many PV modules you'll need. You'll also need to decide on a system voltage, which you can control by deciding how many modules to wire in series.

You may have already guessed a couple of problems that we'll have to solve. First, what do we do when the sun isn't shining?

Solving Solar-power Issues in CCTV

Certainly, no one would accept only having electricity during the day, and then only on clear days, if they have a choice. We need energy storage; this is accomplished with a battery storage solution. Even though batteries add ongoing cost and maintenance to the solar system, if you are in a remote area you won’t have a choice but to use them. Solar in a CCTV application is usually last resort. One way around the problem is to connect the charging system to the utility grid, charging the batteries to full capacity so when there is no power available the system will run off the batteries and you won’t have to worry about your system shutting down. An example of this would be a CCTV system to be installed in a parking lot with existing power standards / light poles / electricity poles, where utility power is only supplied during the dark hours and turned off during the day.
P1

P2
you decide to use batteries, keep in mind that they will have to be maintained, and then replaced after a certain number of years usually 5 years is the typical battery life, but newer technologies are always being invented. The PV modules should last 20 years or more, but batteries just don't have that kind of useful life. Batteries in PV systems can also be dangerous because of the energy they store and the acidic electrolytes they contain, so you'll need a well-ventilated, non-metallic enclosure for them.
Although several different kinds of batteries are commonly used, the one characteristic they should all have in common is that they are deep-cycle batteries. Unlike your car battery, which is a shallow-cycle battery, deep-cycle batteries can discharge more of their stored energy while still maintaining long life. Car batteries discharge a large current for a very short time -- to start your car -- and are then immediately recharged as you drive. PV batteries generally have to discharge a smaller current for a longer period (such as all night), while being charged during the day.

The most commonly used deep-cycle batteries in CCTV solar systems are Glass mat or GEL batteries. Deep-cycle lead-acid batteries can't be discharged 100 percent without seriously shortening battery life, and generally, PV systems are designed to discharge lead-acid batteries no more than 40 % or 50 %.

Also, the use of batteries requires the installation of another component called a charge controller. Batteries last a lot longer if care is taken so that they aren't overcharged or drained too much. That's what a charge controller does. Once the batteries are fully charged, the charge controller doesn't let current from the PV modules continue to flow into them. Similarly, once the batteries have been drained to a certain predetermined level, controlled by measuring battery voltage, many charge controllers will not allow more current to be drained from the batteries until they have been recharged. The use of a charge controller is essential for long battery life.
The other problem besides energy storage is that the electricity generated by your PV modules, and extracted from your batteries may not be in the correct form; depending on what you equipment uses AC or DC voltage you will have to add additional components to change the voltage to the correct one. You will also need to consider the converters power loss and calculate that into the total power draw of the end solution so you have enough to power everything.


Some PV modules, called AC modules, actually have an inverter already built into each module, eliminating the need for a large, central inverter, and simplifying wiring issues.


Now come how to design the CCTV Power system:


This example deals with the design of a stand-alone PV system for powering a remote CCTV transmission system.
Tare a few steps that need to be taken when designing a stand-alone system and we recommend the following:
1. Determine the Load
LOAD: - CCTV camera. It draws an average of 25W for 24 Hrs per day at 24V DC. The current draw is 2.09A.
- Load calculation can be down in two ways: either calculated on a daily basis or weekly. Regardless of which you choose you need to be as accurate as possible.
1.Decide Battery Storage
To be able to handle the CCTV load and allowing for 5 days of battery storage, we require a battery capacity of:
Battery Storage is usually expressed in Amp hours. However, it can be given in Watt hours.
For the above load the battery storage (Ah) would be calculated as: 2.09 A x 24 h x 5 days = 250.8 Ah
  • Watt-Hours = Volts x Amphours
  • Example: 12V @ 250.8Ah = 12 x 250.8 = 3009 Watt hours or (3.9kWh)
Approximation of Array Size - If the system is going to be used all year round and the energy requirement is fairly constant then the design month will be December or January, that is when the weather is at its worst.
Array Size (Wp) = Daily energy requirement in Watt Hours [Wp] / Average Daily PEAK SUN HOURS in the design month / System Effeciency.
Array Size = [25W x 24h] / 2.5 / 0.65
Array Size [Wp] = 600Wh / 2.5 / 0.65 = 369.2Wp

Monday, April 16, 2012

Wireless CCTV – Connecting a Burglar Alarm System


Wireless CCTV cameras or IP cameras are the digital replacement for traditional CCTV, but the technology is sophisticated and there is a lot more you can do other than looking at your home or business from across the internet.  For example, you can connect these cameras to most good burglar alarm systems, so that when a camera detects movement, the alarm system will trigger.  You can also set up your cameras so that when the burglar alarm is tripped, you will get an instant text message on your phone.  These amazing new features can bring many an old alarm system into the 21st century without the cost of replacing it and here in part one of this two-part series, I’m going to look at the things you will need in order to achieve this.

The first thing you need is a wireless internet CCTV camera that has a digital I/O port and an alarm system that has a spare digital I/O port too.  Incidentally, this is just a technical name for a little block of connectors where wires can be attached.  Most serious wireless CCTV cameras have such a port.  If your alarm system has one of these ports, it will be inside the alarm control box.  Not all systems have this, but many do – just take a look in the manual.  If you no longer have a paper copy of the manual, search the support section of the system manufacturer’s website where you can often find an electronic copy.

Having verified that your camera and alarm box has digital I/O ports, you will also need to check a few other things in the alarm system manual and the camera manual.  (If you have not yet bought the camera, find an on-line copy of the manual to carry out these checks before you spend your money.)  First of all, check the voltage and power specifications of the camera’s output port and the alarm’s input port.  Do the same check on the camera’s input port and the alarm system’s output port.  Basically, you need to make sure that there is a match, but it is true to say that most wireless internet CCTV camera ports are designed to work with most alarm system ports.  Next, find the precise connectors that you need to use within the connection block that makes up the port, both on the camera and the alarm box.  The next thing you will need is a length of alarm cable to reach from the camera to the alarm control box.  This cable will typically have at least four strands, but if you can only get eight core or whatever, no problem, we’ll just be using four of the wires for this task.

Once you have reached this stage, you will want to know how to connect everything up, which I will look at in part two of this series, not to mention how to configure the alarm system and camera to make everything work, which I will describe in part three.

Now we find out how to connect the wiring from the I/O port of your camera to the I/O port in your alarm box.

The physical connection is very easy.  First let’s look at the alarm box.  You will need to remove the cover, but make sure that any anti-tamper mechanism is switched off first!  Choose the best point for the wire to pass through the box wall – there are usually a number of pressed potential openings marked on the casing and the one you choose will depend on where the box is situated.  Pass the end of the cable through the opening into the alarm box, then connect two strands to the digital input connectors of the port, and two strands to the output connectors.

Next you will need to run the wiring to the camera and connect it up.  It is always best if you can place the wiring where it will not get trodden on, as this may in time break the strands.  You also need to consider possible tampering.  If this wire is cut, your home security system will still work, as will your wireless CCTV camera, but they will not work together which is our objective here.  Therefore it is best if the wiring is hidden within a stud wall or a ceiling, if this is at all possible. Bringing the wiring to the alarm box from the wall behind it is also a very good idea if you can manage it, as this makes it practically inaccessible to intruders.

The final part of the physical installation is the wireless CCTV camera end.  Find the output connectors of the I/O port, and connect the same coloured strands that you connected to the alarm box input connectors.  Make sure you re-check the manuals to be certain of connecting the wires the right way round; it makes a difference and if you get it wrong you could damage your wireless CCTV equipment.  Similarly, take the strands that you connected to the alarm’s output connectors and join these to the camera’s inputs, again making sure you get them the right way round.

Having connected the wiring, you are ready to configure the alarm box and wireless CCTV camera to make everything work.  Have your camera manual and your alarm system manual at the ready, and then take a look at the final part in this series, part three, to find out how to achieve this.

Now in this part of the series you will find out how to configure everything to turn your old burglar alarm system into a state-of-the-art home security system for the 21st century.

Check your alarm system manual to see if you need to do any re-programming of the box, or moving of dip switches or so-called “jumpers” (connectors between two points that can be moved to change a system’s functionality).  You want to make sure that when your camera sends an alarm signal to the input port of the alarm box (when it detects movement), it causes the alarm system to trigger.  You also want to make the burglar alarm activate its digital output port and thereby inform the camera when the alarm system is triggered.

At the camera end, check the camera manual to find out how to configure an event action so that when the camera detects movement, it sends a signal down the cable to the alarm box.  Once you have this set up, when your cameras detects movement, your burglar alarm will go off.  Now make sure the opposite end of the equation works.  The aim is that when the burglar alarm triggers and sends a pulse to the camera’s input port, the camera will send a text message to your phone and record images of the scene.  Configure the camera so that it will trigger when its input port is activated.  If you haven’t the time or inclination to do all this yourself, you may prefer to buy a ready-configured camera pack from a wireless CCTV specialist.

When you use wireless CCTV cameras to trigger an alarm system in this way, there are a few safeguards that you need to build in.  These cameras are very sensitive to changes in the picture, and may not always be able to differentiate between a change in light levels, such as a street light coming on outside your home or the sun moving behind a cloud, and an intruder.  For this reason it is very important only to use a camera in this way where there is no possibility of a change in natural or artificial light within the camera’s field of vision.  An internal hallway or corridor would be a good location, as any change in the image here would likely require an intruder.

The payback for going through the process of integrating a wireless CCTV camera with your alarm system in this way is that you will end up with a much more effective and useful home security system.  Firstly, it will be able to “see” through the lens of the camera.  Secondly, instead of just ringing an alarm bell on the side of the property, the system will advise you almost instantly of any alarm by sending a text message to your mobile phone, using the functionality of the camera.  This means that you can log in over the internet from wherever you are and see what is going on.  Finally, you will also be able to review the incident that caused the alarm, by looking at images that the camera will have recorded.  You can do all of this within moments of the incident and alert the emergency services who will take you very seriously indeed when you tell them you have actually seen the intruders!

By adding a wireless internet CCTV camera to your alarm system you can achieve peace of mind on a different level.  You will know that if your camera detects movement, your burglar alarm will sound.  You will know that if your burglar alarm is triggered, you will get an instant text message and be able to take a look at what is going on, from wherever you happen to be.  This really can bring the average alarm system into the 21st century without the cost of replacing it.

You can used this article in wire based system.

Thursday, April 5, 2012

Wireless Security Cameras – Pros and Cons

Increasing security concerns have led to increasing numbers of security cameras. Public buildings, stores, banks and private homes have all stepped up the security of their property and installed video cameras. Now, technology has made it easier than ever to look after your property. Low voltage wireless security cameras are the most popular security devices in today’s environment. They offer a number of choices that can meet different security needs. While they offer significant advantages, there are certain disadvantages attached to these cameras as well. It is important to understand both these aspects before taking a decision.

Pros of Using Wireless Security Cameras

1)    No wiring – The absence of wires make wireless security cameras a preferable choice over wired security cameras. Wired systems are very labour intensive and the cost of installation is very high. Also wiring can damage the overall aesthetic appeal of your home decor. Hence, it is always better to go for wireless cameras.
2)    Easy to install – These security cameras are the most easy to install as they do not involve endless wiring as a pre-requisite. You can choose between battery operated cameras or you can opt for the ones that can be plugged into electric sockets. The best do-it-yourself kits come with wireless security cameras.
3)    Portable – You can move around with your home security system in case of wireless cameras. In case, you shift from your current location, the security system can be uninstalled and moved with minimal effort.
4)    Flexible – You can install these cameras even in the most remote of the locations where wiring is not possible. Location is not a constraint for wireless cameras.
5)    Variety – You can choose between varieties of cameras based on your requirements. From big security cameras to the miniature hidden cameras, all options are available in case of wireless security cameras.
Wireless CCTV

Cons of Using Wireless Cameras

1)    Disruption of Signal – Most wireless security cameras send signal through wireless routers. The signal strength can become particularly weak if such devices are installed at the outer perimeter of the signal coverage.
Also, the signals of other wireless devices like phones, wireless networks can disrupt the signals from wireless cameras. A huge obstruction like a tree can also prevent the signal from passing on. Thus, these cameras can be unreliable at times.
2)    High Maintenance – If you have selected cameras that run on batteries, you need to frequently monitor these cameras for any need to change the batteries. If you run out of power at a crucial moment, the entire security system will suffer. If you have selected cameras that run with electric power, you need to have electric sockets wherever you want to install cameras, which may not be possible for difficult to reach locations.
3)    Unsecured – The signal from wireless security cameras can easily be hacked if it is not secured properly. In this case, probable intruders can watch the coverage provided by your cameras and can find alternative places to enter the building. Also, signal can be disrupted by intelligent hackers.
As there are many pros and cons of using wireless security cameras, one must give due consideration to their requirements before making the final decision.