Monday, April 23, 2012

Why Solar ?


In the long term, solar energy is the best answer to the greenhouse effect. Solar energy is CO2 free and virtually inexhaustible. According to the International Energy Agency (IEA), at present, solar energy constitutes a mere 0.04% of worldwide energy consumption whereas fossil fuels feed over 80% of the world energy supply. However, some key facts on solar energy highlight its significant potential:
  • Two billion people in the world have no access to electricity. For most of them, solar energy would be their cheapest electricity source, but they cannot afford it.
  • Unlike fossil fuels, which produce significant amounts of pollution and enormous amounts of greenhouse gases, the sun's energy is clean and its supply virtually limitless.
  • In just one hour, the Earth receives more energy from the sun than human beings consume during an entire year.
  • According to America's Department of Energy, solar panels could, if placed on about 0.5% of USA’s mainland landmass, provide for all of its current electricity needs.
  • The Sun has sufficient helium mass to provide the Earth with energy for another five billion years and, every 15 minutes, it emits more energy than humankind uses in an entire year.
  • The Earth receives only one half of one billionth of the Sun's radiant energy, but in just a few days it gets as much heat and light as could be produced by burning all the oil, coal and wood on the planet.
In addition to the dramatic benefits to reducing global warming, harnessing solar power can reap significant benefits for individuals and businesses alike. For example, businesses can use solar energy to:
  • Reduce the risk of volatile and rising fossil fuel prices, thereby reducing or stabilizing operating costs, particularly as governments move to tax carbon emissions.
  • Take advantage of government incentives and rebates which are designed to increase the use of renewable energy sources.
  • Reduce the risk and cost of power outages and backup power systems.
  • Strengthen relationships with key stakeholders such as customers and the community, by demonstrating sensitivity to climate change issues.
Solar panels absorb sunlight through their silicon membrane and turn the energy absorbed into useable power.

You have probably also been hearing about the "solar revolution" for the last 22 years -- the idea that one day we will all use free electricity from the sun. This is a seductive promise: On a bright, sunny day, the sun shines approximately 1,000 watts of energy per square meter of the planet's surface, and if we could collect all of that energy we could easily power our homes and offices for free.
In this article, we will examine solar cells to learn how they convert the sun's energy directly into electricity. In the process, you will learn why we are getting closer to using the sun's energy on a daily basis, and why we still have more research to do before the process becomes cost effective.

Photovoltaic Cells: Converting Photons to Electrons

The solar cells that you see on calculators and satellites are photovoltaic cells or modules (modules are simply a group of cells electrically connected and packaged in one frame). Photovoltaic’s, as the word implies (photo = light, voltaic = electricity), convert sunlight directly into electricity. Once used almost exclusively in space, Photovoltaic’s are used more and more in less exotic ways. They could even power your house.

How do these devices work?
Photovoltaic (PV) cells are made of special materials called semiconductors such as silicon, which is currently the most commonly used. Basically, when light strikes the cell, a certain portion of it is absorbed within the semiconductor material. This means that the energy of the absorbed light is transferred to the semiconductor. The energy knocks electrons loose, allowing them to flow freely.

PV cells also all have one or more electric fields that act to force electrons freed by light absorption to flow in a certain direction. This flow of electrons is a current, and by placing metal contacts on the top and bottom of the PV cell, we can draw that current off to use externally. For example, the current can power a calculator. This current, together with the cell's voltage (which is a result of its built-in electric field or fields), defines the power (or wattage) that the solar cell can produce.

That's the basic process, but there's really much more to it. Let's take a deeper look into one example of a PV cell: the single-crystal silicon cell.

How Silicon Makes a Solar Cell

Silicon has some special chemical properties, especially in its crystalline form. An atom of silicon has 14 electrons, arranged in three different shells. The first two shells, those closest to the center, are completely full. The outer shell, however, is only half full, having only four electrons. A silicon atom will always look for ways to fill up its last shell (which would like to have eight electrons). To do this, it will share electrons with four of its neighbor silicon atoms. It's like every atom holds hands with its neighbors, except that in this case, each atom has four hands joined to four neighbors. That's what forms the crystalline structure, and that structure turns out to be important to this type of PV cell.
We've now described pure, crystalline silicon. Pure silicon is a poor conductor of electricity because none of its electrons are free to move about, as electrons are in good conductors such as copper. Instead, the electrons are all locked in the crystalline structure. The silicon in a solar cell is modified slightly so that it will work as a solar cell.
A solar cell has silicon with impurities -- other atoms mixed in with the silicon atoms, changing the way things work a bit. We usually think of impurities as something undesirable, but in our case, our cell wouldn't work without them. These impurities are actually put there on purpose. Consider silicon with an atom of phosphorous here and there, maybe one for every million silicon atoms.
Phosphorous has five electrons in its outer shell, not four. It still bonds with its silicon neighbor atoms, but in a sense, the phosphorous has one electron that doesn't have anyone to hold hands with. It doesn't form part of a bond, but there is a positive proton in the phosphorous nucleus holding it in place.
When energy is added to pure silicon, for example in the form of heat, it can cause a few electrons to break free of their bonds and leave their atoms. A hole is left behind in each case. These electrons then wander randomly around the crystalline lattice looking for another hole to fall into. These electrons are called free carriers, and can carry electrical current.

There are so few of them in pure silicon, however, that they aren't very useful. Our impure silicon with phosphorous atoms mixed in is a different story. It turns out that it takes a lot less energy to knock loose one of our "extra" phosphorous electrons because they aren't tied up in a bond -- their neighbors aren't holding them back. As a result, most of these electrons do break free, and we have a lot more free carriers than we would have in pure silicon. The process of adding impurities on purpose is called doping, and when doped with phosphorous, the resulting silicon is called N-type ("n" for negative) because of the prevalence of free electrons. N-type doped silicon is a much better conductor than pure silicon is.
Actually, only part of our solar cell is N-type. The other part is doped with boron, which has only three electrons in its outer shell instead of four, to become P-type silicon. Instead of having free electrons, P-type silicon ("p" for positive) has free holes. Holes really are just the absence of electrons, so they carry the opposite (positive) charge. They move around just like electrons do.
The interesting part starts when you put N-type silicon together with P-type silicon. Remember that every PV cell has at least one electric field. Without an electric field, the cell wouldn't work, and this field forms when the N-type and P-type silicon are in contact. Suddenly, the free electrons in the N side, which have been looking all over for holes to fall into, see all the free holes on the P side, and there's a mad rush to fill them in.

Anatomy of a Solar Cell


Solar energy is renewable energy for humans. It's also clean energy, do not generate any environmental pollution. Solar photovoltaic (PV) was the most watched item in the researching of solar energy utilize.
Solar PV Panel
The production of solar cells based on semiconductor materials, and its working principle is photovoltaic materials photoelectron conversion reaction after absorb light energy, according to different materials, solar cells can be divided into: 
1, silicon solar cells; 
2 multi-material cells using inorganic salts such as gallium arsenide III-V compounds, cadmium sulfide, copper indium selenium compounds; 
3, polymer materials solar cells; 
4, nano-crystalline solar cells. 

etc.


1.Silicon solar cells
Silicon solar cell's structure and working principle,
Solar cells' elements is the photoelectric effect of semiconductors, normally simiconductors have below structure:
Solar Cell
 As shown in the picture, 
positive charge(+) means silicon atom, 
negtive charge(-) means electron around the silicon atom.


A hole will exist in the crystalline silicon when the 
cyrstalline silicon mixed with boron, 


it's shape as below picture:


Silicon Crystalline

 In the picture, Positive charge (+) means silicon atom, Negetive charge(-) means electron around the silicon atom. and the yellow means mixed boron atom, as only 3 electron around the boron atom, it's bring the hole as in blue, this hole is unstable as it's without electron, easily absorb electron to neutralize to be a P(positive) type semiconductor.

Sameness, when mixed with phosphor atom, it's become highly active as the phosphor atom have 5 electron, it's comes the N(negative) type semiconductor. as shown in below picture, the yellow means Phosphor atom, the red means superfluous electron.

yellow means Phosphor atom, the red means superfluous electron.

N type semiconductor contains more hole, while the P type semiconductor contains more electron, in this way, the electric potential difference will be formed when the P and N type semiconductor combine, that comes the PN junction.


When the P and N-type semiconductor combine, the two types of semiconductors at the interface region will form a special thin-layer, the P side contains negative electron, N side contains positive electron. This is because P-type semiconductor have many hole, N-type semiconductor have many free electrons. Electron from N-zone will be spread to the P-zone, hole from the P-zone will spread to the N-zone.

When the lights reach the crystalline silicon, the hole from N-type semiconductor move to P zone, and electron from P-zone move to N-zone, that formed the electric current from N-zone to P-zone, then formed the electric potential difference, that comes the electricity source. (shown in below picture)
Because the semiconductor is not a good conductor of electricity, the electron will waste very much when passed the P-N junction and flow in semiconductor as it's large resistance. However, if painted a metal upper, sunlight can not going through, electric current will not be able to produce, so in general with a metal mesh covering the p-n junction, in order to increase the size of the incident light.

In addition, the silicon surface is very bright, will reflect many of the sun lights, could not be used by the solar cells. Therefore, scientists painted it with a very small reflectance film, to decrease the sunlight reflection loss below 5% or eve less. A single solar cell can provide only a limited current and voltage, so people join many pieces of solar cells (usually 36) in parallel or series to become the solar modules.


2. Crystalline silicon solar cell manufacturing process.

Usual crystalline silicon solar cells are made up from the high-quality silicon at thickness of 350 ~ 450μm, such silicon wafers are cutted from Czochralski or casted silicon ingot
The above method consum more silicon material. In order to save materials, the current preparation of polycrystalline silicon thin-film solar cells using chemical vapor deposition method, including low pressure chemical vapor deposition (LPCVD) and plasma enhanced chemical vapor deposition (PECVD) process. In addition, liquid phase epitaxy (LPPE) and sputtering deposition method can also be used to prepare poly-silicon thin-film battery.
Chemical vapor deposition mainly the SiH2Cl2, SiHCl3, SiCl4 or SiH4, as the reaction gas, It's react at a certain protection atmosphere and deposit silicon atoms at the heated substrate, the general substrate materials are Si, SiO2, Si3N4, etc.. But the researching found that it's difficult to form the large crystal on the amorphous silicon (a-si) substrates and easy to cause interspace between crystal. Solutions for this problem is to deposited a thin layer of amorphous silicon on the substrate by LPCVD, then annealing this layer of amorphous silicon, to get larger crystal, and then deposited a more thick poly-crystalline silicon film at this layer, therefore, re-crystallization technology is no doubt a very important aspect, the current technology used is solid-phase crystallization and recrystallization in the FZ method. Poly-silicon thin-film solar cells not onlyi use the re-crystallization process, also used almost all of the mono-crystalline silicon solar cells preparation technology, the solar cells made by this way have a remarkably increased it's conversion efficiency.


3. Nanocrystalline chemistry solar cell
Silicon solar cells are undoubtedly the most sophisticated atom all solar cells, but because of its high cost, can not meet the requirements of large-scale application. Therefore, Peoples always explore in process, new material and thin film solar cells etc, among this, the newly developed nano TiO2 crystalline chemistry solar cells get a great importance from home and abroad scientists.
For example, the dye-sensitized nano-crystalline solar cell (DSSCs), such solar cells mainly includes a glass substrate deposited with trasparent conductive film, dye-sensitized semiconductor materials, electrode and electrolyte etc.
As shown in below picture, the white ball means TiO2, red ball means dye molecules. Dye molecules transite to excited state after absorb solar energy, excited state unstable, the electron rapidly injected into the nearby TiO2 conduction band, Dye lost the electron is quickly be compensated from the electrolyte, electron enter the conduction band of TiO2 and eventually enter the electric conductive film, and then through the outer loop photo-current generated.

Nano-crystallineTiO2 solar cells have it's advantages of cheap cost, simple production process and a stable performance. Photoelectric efficiency stability at 10%, and the production costs is only 1 / 5 ~ 1 / 10 of silicon solar cells. Life expectancy can achieve more than 20 years. However, because of such a solar cell researching and development still in its infancy, it is estimated to be in the market gradually.


Anode: dye-sensitized semi-conductive thin film ( TiO2 film)
Cathode: TCO glass deposted with platinic
Electrolyte: I3-/I-


How do solar panels work?
Solar panels collect solar radiation from the sun and actively convert that energy to electricity. From a solar-powered calculator to an international space station, solar panels generate electricity using the same principles of electronics as chemical batteries or standard electrical outlets. With solar panels, it's all about the free flow of electrons through a circuit.
To understand how solar panels generate electrical power, it might help to take a quick trip back to high school chemistry class. The basic element of solar panels is the same element that helped create the computer revolution -- pure silicon. When silicon is stripped of all impurities, it makes a ideal neutral platform for the transmission of electrons. Silicon also has some atomic-level properties which make it even more attractive for the creation of solar panels.
Solar CCTV System

Silicon atoms have room for eight electrons in their outer bands, but only carry four in their natural state. This means there is room for four more electrons. If one silicon atom contacts another silicon atom, each receives the other atom's four electrons. This creates a strong bond, but there is no positive or negative charge because the eight electrons satisfy the atoms' needs. Silicon atoms can combine for years to result in a large piece of pure silicon. This material is used to form the plates of solar panels.

Here's where science enters the picture. Two plates of pure silicon would not generate electricity in solar panels, because they have no positive or negative charge. Solar panels are created by combining silicon with other elements that do have positive or negative charges.
Phosphorus, for example, has five electrons to offer to other atoms. If silicon and phosphorus are combined chemically, the result is a stable eight electrons with an additional free electron along for the ride. It can\'t leave, because it is bonded to the other phosphorus atoms, but it isn't needed by the silicon. Therefore, this new silicon/phosphorus plate is considered to be negatively charged.
In order for electricity to flow, a positive charge must also be created. This is achieved in solar panels by combining silicon with an element such as boron, which only has three electrons to offer. A silicon/boron plate still has one spot left for another electron. This means the plate has a positive charge. The two plates are sandwiched together in solar panels, with conductive wires running between them.
With the two plates in place, it's now time to bring in the 'solar' aspect of solar panels. Natural sunlight sends out many different particles of energy, but the one we're most interested in is called a photon. A photon essentially acts like a moving hammer. When the negative plates of solar cells are pointed at a proper angle to the sun, photons bombard the silicon/phosphorus atoms.
Eventually, the 9th electron, which wants to be free anyway, is knocked off the outer ring. This electron doesn't remain free for long, since the positive silicon/boron plate draws it into the open spot on its own outer band. As the sun's photons break off more electrons, electricity is generated. The electricity generated by one solar cell is not very impressive, but when all of the conductive wires draw the free electrons away from the plates, there is enough electricity to power low amperage motors or other electronics. Whatever electrons are not used or lost to the air are returned to the negative plate and the entire process begins again.


One of the main problems with using solar panels is the small amount of electricity they generate compared to their size. A calculator might only require a single solar cell, but a solar-powered car would require several thousand. If the angle of the solar panels is changed even slightly, the efficiency can drop 50 percent.
Some power from solar panels can be stored in chemical batteries, but there usually isn't much excess power in the first place. The same sunlight that provides photons also provides more destructive ultraviolet and infrared waves, which eventually cause the panels to degrade physically. The panels must also be exposed to destructive weather elements, which can also seriously affect efficiency.
Many sources also refer to solar panels as photovoltaic cells, which references the importance of light (photos) in the generation of electrical voltage
The challenge for future scientists will be to create more efficient solar panels are small enough for practical applications and powerful enough to create excess energy for times when sunlight is not available.

Energy Loss in a Solar Cell
Visible light is only part of the electromagnetic spectrum. Electromagnetic radiation is not monochromatic -- it is made up of a range of different wavelengths, and therefore energy levels. Light can be separated into different wavelengths, and we can see them in the form of a rainbow. Since the light that hits our cell has photons of a wide range of energies, it turns out that some of them won't have enough energy to form an electron-hole pair. They'll simply pass through the cell as if it were transparent. Still other photons have too much energy. Only a certain amount of energy, measured in electron volts (eV) and defined by our cell material (about 1.1 eV for crystalline silicon), is required to knock an electron loose. We call this the band gap energy of a material.
If a photon has more energy than the required amount, then the extra energy is lost (unless a photon has twice the required energy, and can create more than one electron-hole pair, but this effect is not significant). These two effects alone account for the loss of around 70 percent of the radiation energy incident on our cell.
Why can't we choose a material with a really low band gap, so we can use more of the photons? Unfortunately, our band gap also determines the strength (voltage) of our electric field, and if it's too low, then what we make up in extra current (by absorbing more photons), we lose by having a small voltage. Remember that power is voltage times current. The optimal band gap, balancing these two effects, is around 1.4 eV for a cell made from a single material.
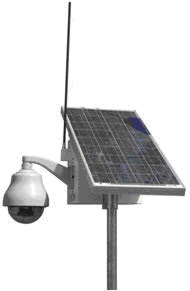
Speed Dome with Solar
We have other losses as well. Our electrons have to flow from one side of the cell to the other through an external circuit. We can cover the bottom with a metal, allowing for good conduction, but if we completely cover the top, then photons can't get through the opaque conductor and we lose all of our current (in some cells, transparent conductors are used on the top surface, but not in all). If we put our contacts only at the sides of our cell, then the electrons have to travel an extremely long distance (for an electron) to reach the contacts.

Remember, silicon is a semiconductor -- it's not nearly as good as a metal for transporting current. Its internal resistance (called series resistance) is fairly high, and high resistance means high losses. To minimize these losses, our cell is covered by a metallic contact grid that shortens the distance that electrons have to travel while covering only a small part of the cell surface. Even so, some photons are blocked by the grid, which can't be too small or else its own resistance will be too high.

Wednesday, April 18, 2012

Stand-Alone Power System Design Procedure for CCTV System

What would you have to do to power your equipment with solar energy? Although it's not as simple as just slapping some modules on your equipment, it's not extremely difficult to do either, but will require calculations.

First of all, not every location has the correct orientation or angle of inclination to take advantage of the suns energy. Non-tracking PV systems in the Northern Hemisphere should point toward true south (this is the orientation). They should be inclined at an angle equal to the area's latitude to absorb the maximum amount of energy year-round. A different orientation and/or inclination could be used if you want to maximize energy production for the morning or afternoon, and/or the summer or winter. Of course, the modules should never be shaded by nearby trees or buildings, no matter the time of day or the time of year. In a PV module, even if just one of its 36 cells is shaded, power production will be reduced by more than half.

If you have a location with an un-shaded, south-facing orientation, you need to decide what size system you need. This is complicated by the facts that your electricity production depends on the weather, which is never completely predictable, and that your electricity demand will also vary.

These hurdles are fairly easy to clear. Meteorological data gives average monthly sunlight levels for different geographical areas. This takes into account rainfall and cloudy days, as well as altitude, humidity, and other more subtle factors. You should design for the worst month, so that you'll have enough electricity all year. With that data, and knowing your equipments power requirement (you must add together the power requirements of all equipment you intend to power with your solar system), there are simple methods you can use to determine just how many PV modules you'll need. You'll also need to decide on a system voltage, which you can control by deciding how many modules to wire in series.

You may have already guessed a couple of problems that we'll have to solve. First, what do we do when the sun isn't shining?

Solving Solar-power Issues in CCTV

Certainly, no one would accept only having electricity during the day, and then only on clear days, if they have a choice. We need energy storage; this is accomplished with a battery storage solution. Even though batteries add ongoing cost and maintenance to the solar system, if you are in a remote area you won’t have a choice but to use them. Solar in a CCTV application is usually last resort. One way around the problem is to connect the charging system to the utility grid, charging the batteries to full capacity so when there is no power available the system will run off the batteries and you won’t have to worry about your system shutting down. An example of this would be a CCTV system to be installed in a parking lot with existing power standards / light poles / electricity poles, where utility power is only supplied during the dark hours and turned off during the day.
P1

P2
you decide to use batteries, keep in mind that they will have to be maintained, and then replaced after a certain number of years usually 5 years is the typical battery life, but newer technologies are always being invented. The PV modules should last 20 years or more, but batteries just don't have that kind of useful life. Batteries in PV systems can also be dangerous because of the energy they store and the acidic electrolytes they contain, so you'll need a well-ventilated, non-metallic enclosure for them.
Although several different kinds of batteries are commonly used, the one characteristic they should all have in common is that they are deep-cycle batteries. Unlike your car battery, which is a shallow-cycle battery, deep-cycle batteries can discharge more of their stored energy while still maintaining long life. Car batteries discharge a large current for a very short time -- to start your car -- and are then immediately recharged as you drive. PV batteries generally have to discharge a smaller current for a longer period (such as all night), while being charged during the day.

The most commonly used deep-cycle batteries in CCTV solar systems are Glass mat or GEL batteries. Deep-cycle lead-acid batteries can't be discharged 100 percent without seriously shortening battery life, and generally, PV systems are designed to discharge lead-acid batteries no more than 40 % or 50 %.

Also, the use of batteries requires the installation of another component called a charge controller. Batteries last a lot longer if care is taken so that they aren't overcharged or drained too much. That's what a charge controller does. Once the batteries are fully charged, the charge controller doesn't let current from the PV modules continue to flow into them. Similarly, once the batteries have been drained to a certain predetermined level, controlled by measuring battery voltage, many charge controllers will not allow more current to be drained from the batteries until they have been recharged. The use of a charge controller is essential for long battery life.
The other problem besides energy storage is that the electricity generated by your PV modules, and extracted from your batteries may not be in the correct form; depending on what you equipment uses AC or DC voltage you will have to add additional components to change the voltage to the correct one. You will also need to consider the converters power loss and calculate that into the total power draw of the end solution so you have enough to power everything.


Some PV modules, called AC modules, actually have an inverter already built into each module, eliminating the need for a large, central inverter, and simplifying wiring issues.


Now come how to design the CCTV Power system:


This example deals with the design of a stand-alone PV system for powering a remote CCTV transmission system.
Tare a few steps that need to be taken when designing a stand-alone system and we recommend the following:
1. Determine the Load
LOAD: - CCTV camera. It draws an average of 25W for 24 Hrs per day at 24V DC. The current draw is 2.09A.
- Load calculation can be down in two ways: either calculated on a daily basis or weekly. Regardless of which you choose you need to be as accurate as possible.
1.Decide Battery Storage
To be able to handle the CCTV load and allowing for 5 days of battery storage, we require a battery capacity of:
Battery Storage is usually expressed in Amp hours. However, it can be given in Watt hours.
For the above load the battery storage (Ah) would be calculated as: 2.09 A x 24 h x 5 days = 250.8 Ah
  • Watt-Hours = Volts x Amphours
  • Example: 12V @ 250.8Ah = 12 x 250.8 = 3009 Watt hours or (3.9kWh)
Approximation of Array Size - If the system is going to be used all year round and the energy requirement is fairly constant then the design month will be December or January, that is when the weather is at its worst.
Array Size (Wp) = Daily energy requirement in Watt Hours [Wp] / Average Daily PEAK SUN HOURS in the design month / System Effeciency.
Array Size = [25W x 24h] / 2.5 / 0.65
Array Size [Wp] = 600Wh / 2.5 / 0.65 = 369.2Wp

Monday, April 16, 2012

Wireless CCTV – Connecting a Burglar Alarm System


Wireless CCTV cameras or IP cameras are the digital replacement for traditional CCTV, but the technology is sophisticated and there is a lot more you can do other than looking at your home or business from across the internet.  For example, you can connect these cameras to most good burglar alarm systems, so that when a camera detects movement, the alarm system will trigger.  You can also set up your cameras so that when the burglar alarm is tripped, you will get an instant text message on your phone.  These amazing new features can bring many an old alarm system into the 21st century without the cost of replacing it and here in part one of this two-part series, I’m going to look at the things you will need in order to achieve this.

The first thing you need is a wireless internet CCTV camera that has a digital I/O port and an alarm system that has a spare digital I/O port too.  Incidentally, this is just a technical name for a little block of connectors where wires can be attached.  Most serious wireless CCTV cameras have such a port.  If your alarm system has one of these ports, it will be inside the alarm control box.  Not all systems have this, but many do – just take a look in the manual.  If you no longer have a paper copy of the manual, search the support section of the system manufacturer’s website where you can often find an electronic copy.

Having verified that your camera and alarm box has digital I/O ports, you will also need to check a few other things in the alarm system manual and the camera manual.  (If you have not yet bought the camera, find an on-line copy of the manual to carry out these checks before you spend your money.)  First of all, check the voltage and power specifications of the camera’s output port and the alarm’s input port.  Do the same check on the camera’s input port and the alarm system’s output port.  Basically, you need to make sure that there is a match, but it is true to say that most wireless internet CCTV camera ports are designed to work with most alarm system ports.  Next, find the precise connectors that you need to use within the connection block that makes up the port, both on the camera and the alarm box.  The next thing you will need is a length of alarm cable to reach from the camera to the alarm control box.  This cable will typically have at least four strands, but if you can only get eight core or whatever, no problem, we’ll just be using four of the wires for this task.

Once you have reached this stage, you will want to know how to connect everything up, which I will look at in part two of this series, not to mention how to configure the alarm system and camera to make everything work, which I will describe in part three.

Now we find out how to connect the wiring from the I/O port of your camera to the I/O port in your alarm box.

The physical connection is very easy.  First let’s look at the alarm box.  You will need to remove the cover, but make sure that any anti-tamper mechanism is switched off first!  Choose the best point for the wire to pass through the box wall – there are usually a number of pressed potential openings marked on the casing and the one you choose will depend on where the box is situated.  Pass the end of the cable through the opening into the alarm box, then connect two strands to the digital input connectors of the port, and two strands to the output connectors.

Next you will need to run the wiring to the camera and connect it up.  It is always best if you can place the wiring where it will not get trodden on, as this may in time break the strands.  You also need to consider possible tampering.  If this wire is cut, your home security system will still work, as will your wireless CCTV camera, but they will not work together which is our objective here.  Therefore it is best if the wiring is hidden within a stud wall or a ceiling, if this is at all possible. Bringing the wiring to the alarm box from the wall behind it is also a very good idea if you can manage it, as this makes it practically inaccessible to intruders.

The final part of the physical installation is the wireless CCTV camera end.  Find the output connectors of the I/O port, and connect the same coloured strands that you connected to the alarm box input connectors.  Make sure you re-check the manuals to be certain of connecting the wires the right way round; it makes a difference and if you get it wrong you could damage your wireless CCTV equipment.  Similarly, take the strands that you connected to the alarm’s output connectors and join these to the camera’s inputs, again making sure you get them the right way round.

Having connected the wiring, you are ready to configure the alarm box and wireless CCTV camera to make everything work.  Have your camera manual and your alarm system manual at the ready, and then take a look at the final part in this series, part three, to find out how to achieve this.

Now in this part of the series you will find out how to configure everything to turn your old burglar alarm system into a state-of-the-art home security system for the 21st century.

Check your alarm system manual to see if you need to do any re-programming of the box, or moving of dip switches or so-called “jumpers” (connectors between two points that can be moved to change a system’s functionality).  You want to make sure that when your camera sends an alarm signal to the input port of the alarm box (when it detects movement), it causes the alarm system to trigger.  You also want to make the burglar alarm activate its digital output port and thereby inform the camera when the alarm system is triggered.

At the camera end, check the camera manual to find out how to configure an event action so that when the camera detects movement, it sends a signal down the cable to the alarm box.  Once you have this set up, when your cameras detects movement, your burglar alarm will go off.  Now make sure the opposite end of the equation works.  The aim is that when the burglar alarm triggers and sends a pulse to the camera’s input port, the camera will send a text message to your phone and record images of the scene.  Configure the camera so that it will trigger when its input port is activated.  If you haven’t the time or inclination to do all this yourself, you may prefer to buy a ready-configured camera pack from a wireless CCTV specialist.

When you use wireless CCTV cameras to trigger an alarm system in this way, there are a few safeguards that you need to build in.  These cameras are very sensitive to changes in the picture, and may not always be able to differentiate between a change in light levels, such as a street light coming on outside your home or the sun moving behind a cloud, and an intruder.  For this reason it is very important only to use a camera in this way where there is no possibility of a change in natural or artificial light within the camera’s field of vision.  An internal hallway or corridor would be a good location, as any change in the image here would likely require an intruder.

The payback for going through the process of integrating a wireless CCTV camera with your alarm system in this way is that you will end up with a much more effective and useful home security system.  Firstly, it will be able to “see” through the lens of the camera.  Secondly, instead of just ringing an alarm bell on the side of the property, the system will advise you almost instantly of any alarm by sending a text message to your mobile phone, using the functionality of the camera.  This means that you can log in over the internet from wherever you are and see what is going on.  Finally, you will also be able to review the incident that caused the alarm, by looking at images that the camera will have recorded.  You can do all of this within moments of the incident and alert the emergency services who will take you very seriously indeed when you tell them you have actually seen the intruders!

By adding a wireless internet CCTV camera to your alarm system you can achieve peace of mind on a different level.  You will know that if your camera detects movement, your burglar alarm will sound.  You will know that if your burglar alarm is triggered, you will get an instant text message and be able to take a look at what is going on, from wherever you happen to be.  This really can bring the average alarm system into the 21st century without the cost of replacing it.

You can used this article in wire based system.

Thursday, April 5, 2012

Wireless Security Cameras – Pros and Cons

Increasing security concerns have led to increasing numbers of security cameras. Public buildings, stores, banks and private homes have all stepped up the security of their property and installed video cameras. Now, technology has made it easier than ever to look after your property. Low voltage wireless security cameras are the most popular security devices in today’s environment. They offer a number of choices that can meet different security needs. While they offer significant advantages, there are certain disadvantages attached to these cameras as well. It is important to understand both these aspects before taking a decision.

Pros of Using Wireless Security Cameras

1)    No wiring – The absence of wires make wireless security cameras a preferable choice over wired security cameras. Wired systems are very labour intensive and the cost of installation is very high. Also wiring can damage the overall aesthetic appeal of your home decor. Hence, it is always better to go for wireless cameras.
2)    Easy to install – These security cameras are the most easy to install as they do not involve endless wiring as a pre-requisite. You can choose between battery operated cameras or you can opt for the ones that can be plugged into electric sockets. The best do-it-yourself kits come with wireless security cameras.
3)    Portable – You can move around with your home security system in case of wireless cameras. In case, you shift from your current location, the security system can be uninstalled and moved with minimal effort.
4)    Flexible – You can install these cameras even in the most remote of the locations where wiring is not possible. Location is not a constraint for wireless cameras.
5)    Variety – You can choose between varieties of cameras based on your requirements. From big security cameras to the miniature hidden cameras, all options are available in case of wireless security cameras.
Wireless CCTV

Cons of Using Wireless Cameras

1)    Disruption of Signal – Most wireless security cameras send signal through wireless routers. The signal strength can become particularly weak if such devices are installed at the outer perimeter of the signal coverage.
Also, the signals of other wireless devices like phones, wireless networks can disrupt the signals from wireless cameras. A huge obstruction like a tree can also prevent the signal from passing on. Thus, these cameras can be unreliable at times.
2)    High Maintenance – If you have selected cameras that run on batteries, you need to frequently monitor these cameras for any need to change the batteries. If you run out of power at a crucial moment, the entire security system will suffer. If you have selected cameras that run with electric power, you need to have electric sockets wherever you want to install cameras, which may not be possible for difficult to reach locations.
3)    Unsecured – The signal from wireless security cameras can easily be hacked if it is not secured properly. In this case, probable intruders can watch the coverage provided by your cameras and can find alternative places to enter the building. Also, signal can be disrupted by intelligent hackers.
As there are many pros and cons of using wireless security cameras, one must give due consideration to their requirements before making the final decision.

Monday, March 26, 2012

Solar Powered Wireless CCTV (WCCTV)


We are seeing a boom in technology. New and intelligent gadgets are being made on a daily basis. One such invention is the wireless CCTV powered by solar energy. Wireless technology is the one the fastest growing technologies, it is very fast, easy and makes life a lot easier. And to combine this technology with solar power would be a great pairing.
Solar power is the need of the hour; with the environment’s future at stake, scientists are turning towards solar power as the next best option for clean energy. Solar energy is renewable and leaves no harmful by-products like carbon dioxide. It uses the power of the sun to generate electricity.

Practical Combination of Solar Powered Wireless CCTV

It makes a lot of sense to combine solar energy with wireless CCTV. Wireless cameras have to be running 24/7 to be able to give uninterrupted footage which is very essential for security. Running them constantly will give a very high electricity bill. Switching over to a solar-powered system will not only save costs, but it will actually pay for itself within a few years.

How Will It Work?

The cameras that are placed outside will be constantly charged by the sunlight. The cameras that are on the inside can be charged by a solar panel which is kept on the roof. A good battery back-up will ensure non-stop power supply, when the weather is cloudy or is raining and during night times. These batteries too will be charged by solar power.

Expenses

Granted, all of the things required for a good system are on the expensive side. But all of them are a one-time buy and money you save on the electric bill will pay for them. Not only will you be saving money, but you will also generate your own electricity.

Try It !

Best way would be trying the system. Place the solar-powered cameras that can be used outside, put them in places that give a good view of the property, and have direct sunlight. Run them for a month or so and then see the difference in the bill. If convinced, only then install the whole system, and start saving money and the planet together.

Wireless CCTV Technological Compatibility

Wireless security systems are high-tech and have all the latest functions that are required of a good security system. These systems are built to function using minimal electricity. Solar panels are large in size, but since not much power is required, the panels can be of practical size. Plus with more and more advancement, solar power generation has come forward in leaps and bounds.

Looking in Future

The future belongs to clean power. Governments are coming out with rules that support clean energies like solar power. They even offer tax breaks and credit points for such technologies. Having a solar power CCTV system will not only save money electricity wise but will also save your taxes.

Solar power and wireless systems are the thing of the future then why not have them now and be miles ahead of others.

Wednesday, March 21, 2012

The Right Location to Install your Outdoor Security Camera


We spent hundreds to thousands of currency in getting a security system that will provide the best level of security to our members. Covering the outdoor areas, through outdoor security cameras, is an essential part of a good security system. The outdoor camera can give you the best results only when it is placed at the right location.

Before you go ahead and a buy a security camera, it is essential for you to plan the placement of the cameras. Look at all the possible areas inside as well as outside your home. The outer areas should be observed during the day as well as during the night for several days in a row. This will give you a fair idea of the vulnerable areas that are more accessible to rowdy elements.

Let us take an example; while you have decided to cover your lawns and gardens, have you considered your driveway and garage? Incidents of car theft are on a rise and you can prevent damage to your car by securing your driveway and the garage door with a camera. In this case a camera at the outer edge of your garage door will give a good view of any intruder who might attempt to steal your car.

Camera housings are normally made of aluminum or more recently now from extremely durable specialty thermoplastics. Weather conditions, outdoor temperature and equipment temperature rating should dictate if the camera housings will require a heater, de icing system and multiple hi flow fans or possibly an active cooling system. Remember sensitive electronics are just that sensitive -long life, reliability and down time should be all be considered.

All material in front of the camera lens will attenuate the light and an allowance of at least one full f-stop should be used in calculating lighting and camera sensitivity. An auto iris lens should always be used with an outdoor camera. This will give the camera a better dynamic range and protect the image sensor from being damaged by direct sunlight.

The next area to consider will be those small sidewalks or a side alley where you store extra furniture and toys. Most of us try to cover the busy-areas of our house for surveillance while leaving out the less-frequented areas. However, the areas with less traffic are the perfect entrances for a burglar. Look closely at those overgrown garden areas and try to cover areas that have big tress that can obstruct the view from your window. Install the cameras at a high roof top window to get the best view.

Always try to avoid direct sunlight in an image. Direct sunlight may “blind” the camera and filters and burn the CCD causing stripes in the image.

How about your backyard? Do you have a small store where you store your extras – beddings, cutlery and furniture? Such areas are also as vulnerable as the front yard or the garage. Make sure that you cover them with a security camera. If you are finding it difficult to spend huge money on a number of cameras, consider using dummy cameras.

While you cover all the difficult to access and low-traffic areas, make sure that you install cameras in a way that they can be reached for maintenance and frequent checks. Do not use high-rise trees to install cameras as they can be damaged by birds and animals. Also, a camera at a very high location will be very difficult to reach for you as well. A bird’s nest or a spider’s web can obstruct your view frequently and you will have to make changes all the time.

When using a camera outdoors, avoid including too much sky in the image. Due to the large contrast, the camera will adjust in order to achieve a good level for the sky and the interesting landscape or objects may appear too dark. One way to avoid these problems is to mount the camera high above the ground. Used a proper pole with sturdy pole mount adapter or wall mounted bracket and always use proper mountings to avoid vibrations caused by wind.

If cameras are to be used at night additional external light sources may be required such as incandescent, HID or IR illumination.


If you mount a camera behind glass, for example in an outdoor housing, make sure that the lens is close to the external lens. If it is too far away, reflections from the camera and the background may appear in the image.

Hence, other than the obvious locations for an outdoor security camera choose areas that are not visited frequently but install cameras in a way that they can be reached for maintenance and repair.

Tuesday, March 20, 2012

The Disadvantages of CCTV Cameras


Closed-circuit TV cameras supposed to catch violent thugs have been trained on roads instead - to trap and fine motorists who stray into bus lanes.

The most common home security system used is a CCTV system. CCTV stands for Closed circuit television. It is considered a revolutionary invention when it comes to security. Due to it’s advantages it gained fame in no time. It is often used for security purposes in house, stores and banks etc. It keeps an eye on the visitors. It can also be used in schools to track the behavior of a student. It has countless advantages, but that does not mean that it is perfect. Yes! CCTV has its disadvantages as well. In this article we are going to discuss the disadvantages of CCTV camera.

CCTV is not always a perfect working system for security. It does not keep an eye on every corner of your office, house or mall. It can just keep an eye on a limited area. It can be easily sabotage by sticking a gum or spraying something on the lens or cutting the cables.

Usually a CCTV is installed at a spot where humans can not reach but criminals usually can easily view CCTVs position and can possibly change the angle so the camera do not catches the crime scene. CCTV cameras can view what normal people are doing this effect the people in a bad way as there is no privacy left. This is a great disadvantage of CCTV cameras.

But wireless bullet camera is such a technology that has improved security of malls, houses and offices. In some cases the camera may miss the detail of the crime scene. For example a concealed weapon the camera is unable to view it in the first place.

The video of a CCTV can be hacked by a hacker easily. Suppose there is a CCTV installed near an ATM machine. So the hacker will hack the video of that camera and can easily get the pin code and any other information he wants about a customer or ATM user.

Another disadvantage of CCTV is that not everyone can afford it. Despite all these disadvantages CCTV still allows you to secure your place to a great deal. It has disadvantages but as you know nothing is perfect.

The following are some of the potential weaknesses of IP cameras in comparison to other CCTV cameras.
Disadvantages are that they are costly, do not always work (as they are not set up in the right places) and manipulate with people's privacy.
1. Higher initial cost per camera.
2. Fewer choices of manufacturers.
3. Lack of standards. Different IP cameras may encode video differently or use a different programming interface. This means a particular camera model should be deployed only with compatible IP video recording solutions.
4. Technical barrier. Installation for IP camera required a series of complicated network setting including IP address, DDNS, router setting and port forwarding. This is very difficult for most users to do without help from an IT technician.
5. Lower dynamic range - i.e. reduced ability to cope with low light and high contrast scenes.

HDCCTV has the following disadvantages:
1. Closed technology – little room for improvement in picture quality going forward.
2. Limited maximum resolution of 1.8 mega pixels (1080 TV lines)
3. Currently difficult and expensive to transmit HD images over CAT5e network cables.
4. Dumb cameras – only the DVR is addressable over the network or the web

So here is an article that lets you know about few disadvantages of the CCTV camera. But to me CCTVs advantages are so many that in front of them we can neglect its few disadvantages. Hope the article was helpful. Visit regularly arindamcctvaccesscontrol.blogspot.com Thank You.

Monday, March 19, 2012

Transmission of Camera Video Signals by Cable


A CCTV cable is basically an RG59 coaxial cable that is used to transmit a video signal between your security camera and the DVR (Digital Video Recorder). The RG59 is attached to both the security camera and DVR via a male BNC connector. The female BNC connection on the back of the DVR and security camera allows for these components to attach. The BNC connection creates a locking mechanism that creates a long lasting solid connection.
 
This is not meant to be a textbook on transmission but is intended to remove some of the mystery associated with various methods of transmission. Many approximations and simplifications have been used in writing this guide. This is to make the subject more understandable to those people not familiar with the theories. For general application in the design of CCTV systems it should be more than adequate and at least point the way to the main questions that must be addressed. The manufacturers of transmission equipment will usually be only too keen to help in final design.

 This connection diagram illustrates the many methods of getting a picture from a camera to a monitor. The choice will often be dictated by circumstances on the location of cameras and controls. Often there will be more than one option for types of transmission. In these cases there will possibly be trade offs between quality and security of signal against cost. This diagram could now include transmission by IP networks. 

General Principles
 
Video Signal
The essential components of the video signal are covered in Chapters two and three. Certain aspects that are related to the effective transmission of those signals are repeated in this chapter where it is necessary to save continuous cross-reference.
Synchronizing
The video signal from a TV camera has to provide a variety of information at the monitor for a correct TV picture to be displayed. This information can be divided into: Synchronizing pulses that tell the monitor when to start a line and a field; video information that tells the monitor how bright a particular point in the picture should be; chrominance that tells the monitor what colours a particular part of the picture should be (colour cameras only).
Bandwidth
The composite video output from the average CCTV camera covers a bandwidth ranging from 25Hz to 5MHz. The upper frequency is primarily determined by the resolution of the camera and whether it is monochrome or colour. For every 100 lines of resolution, a bandwidth of 1MHz approximately is required. Therefore, a camera with 600 lines resolution gives out a video signal with a bandwidth of approximately 6MHz. This principle applies to both colour and monochrome cameras. However, colour cameras also have to produce a colour signal (chrominance), as well as a monochrome output (luminance). The chrominance signal is modulated on a 4.43MHz carrier wave in the PAL system therefore a colour signal, regardless of definition, has a bandwidth of at least 5MHz.
Requirements to Produce A Good Quality Picture
From the above it will be obvious that to produce a good quality picture on a monitor, the video signal must be applied to the monitor with little or no distortion of any of its elements, i.e. the time relationship of the various signals and amplitude of these signals. However in CCTV systems, the camera has to be connected to a monitor by a cable or another means, such as Fibre Optic or microwave link. This interconnection requires special equipment to interface the video signal to the transmission medium. In cable transmission, special amplifiers may be required to compensate for the cable losses that are frequency dependent.

Cable Transmission
All cables, no matter what their length or quality, cause attenuation when used for the transmission of video signals, the main problem being related to the wide bandwidth requirements of a video signal. All cables produce a loss of signal that is dependent primarily on the frequency, the higher the frequency, the higher the loss. This means that as a video signal travels along a cable it loses its high frequency components faster than its low frequency components. The result of this is a loss of the fine detail (definition) in the picture.
The human eye is very tolerant of errors of this type; a significant loss of detail is not usually objectionable unless the loss is very large. This is fortunate, as the losses of the high frequency components are very high on the types of cables usually used in CCTV systems. For instance, using the common coaxial cables URM70 or RG59, 50% of the signal at 5MHz is lost in 200 meters of cable. To compensate for these losses, special amplifiers may be used. These provide the ability to amplify selectively the high frequency components of the video signal to overcome the cable losses.
Cable Types
There are two main types of cable used for transmitting video signals, which are: Unbalanced (coaxial) and balanced (twisted pair). The construction of each is shown in diagrams 15.2 and 15.3. An unbalanced signal is one in which the signal level is a voltage referenced to ground. For instance, a video signal from the camera is between 0.3 and 1.0 volts above zero (ground level). The shield is the ground level.
A balanced signal is a video signal that has been converted for transmission along a medium other than coaxial cable. Here the signal voltage is the difference between the voltages in each conductor.
External interference is picked up by all types of cable. Rejection of this interference is effected in different ways. Coaxial cable relies on the centre conductor being well screened by the outer copper braid. There are many types of coaxial cable and care should be taken to select one with a 95% braid. In the case of a twisted pair cable, interference is picked up by both conductors in the same direction equally. The video signal is traveling in opposite directions in the two conductors. The interference can then be balanced out by using the correct type of amplifier. This only responds to the signal difference in the two conductors and is known as a differential amplifier.
Unbalanced (Coaxial) Cables
This type of cable is made in many different types of impedance. In this case impedance is measured between the inner conductor and the outer sheath. 75-Ohm impedance cable is the standard used in CCTV systems. Most video equipment is designed to operate at this impedance. Coaxial cables with an impedance of 75 Ohms are available in many different mechanical formats, including single wire armored and irradiated PVC sheathed cable for direct burial. The cables available range in performance from relatively poor to excellent. Performance is normally measured in high frequency loss per 100 meters. The lower this loss figure, the less the distortion to the video signal. Therefore, higher quality cables should be used when transmitting the signal over long distances.
Another factor that should be considered carefully when selecting coaxial cables is the quality of the cable screen. This, as its name suggests, provides protection from interference for the center core, as once interference enters the cable it is almost impossible to remove. 
Unbalanced Cable

Balanced (Twisted Pair) Cables
In a twisted pair each pair of cables is twisted with a slow twist of about one to two twists per meter. These cables are made in many different types of impedance, 100 to 150 Ohms being the most common. Balanced cables have been used for many years in the largest cable networks in the world. Where the circumstances demand, these have advantages over coaxial cables of similar size. Twisted pair cables are frequently used where there would be an unacceptable loss due to a long run of coaxial cable.

The main advantages are:
1. The ability to reject unwanted interference.
2. Lower losses at high frequencies per unit length.
3. Smaller size.
4. Availability of multipair cables.
5. Lower cost.
Balanced Cable
The advantages must be considered in relation to the cost of the equipment required for this type of transmission. A launch amplifier to convert the video signal is needed at the camera end and an equalizing amplifier to reconstruct the signal at the control end.
Impedance
It is extremely important that the impedance of the signal source, cable, and load are all equal. Any mismatch in these will produce unpleasant and unacceptable effects in the displayed picture. These effects can include the production of ghost images and ringing on sharp edges, also the loss or increase in a discrete section of the frequency band within the video signal.
The impedance of a cable is primarily determined by its physical construction, the thickness of the conductors and the spacing between them being the most important factors. The materials used as insulators within the cable also affect this characteristic. Although the signal currents are very low, the sizes of the conductors within the cable are very important. The higher frequency components of the video signal travel only in the surface layer of the conductors.
Transmission Impedance
For maximum power transfer, the load, cable and source impedance must be equal. If there is any mismatch, some of the signal will not be absorbed by the load. Instead, it will be reflected back along the cable to produce ghost image.

Tips and hints while installing co-axial cable.

1. Use solid core co-axial cable only, not stranded cable. The solid core must have a copper core with copper shield
2. Avoid high voltage cable. A good rule to follow is: for every 100 volts there should be a separation of 1ft between the video cable and power cable.
3. While cabling, avoid areas like electrical equipment or transmitter rooms etc., where EMI interference is expected. This can create all types of interference to the video picture. Co-axial cable is very easily prone to EMI.
4. Minimize cable breaks - Every extra connection in the cable can deteriorate the quality of the video signal. If unavoidable, make sure the insulation is good; otherwise over time the exposed cable can touch the ground causing ground loop currents. It may be difficult or expensive to fix such problems in the future.
5. Avoid sharp bends, which affects the cable impedance causing picture reflection and distortion. This is especially true while getting all the cable into the CCTV monitor rack.
6. Poor BNC connections is the major cause of poor picture quality. Also BNC connectors should be replaced every couple of years and should be part of the system maintenance program.
7. Use metal conduits for high security applications.
8. Use heavy-duty cable for outdoor applications providing better protection against the elements.


Before choosing the CCTV cable for your application put some thought into the location of your power supply and your video recording device to determine if using a Siamese CCTV Cable type or individual cables (separate RG59 and 18/2) best suit your installation. If all your equipment is in one central location then using a Siamese CCTV Cable may provide you with the most professional and cleanest installation. We hope your surveillance system installation is a complete success! Good Luck!