Friday, May 1, 2015

Resolution of Network Camera

Resolution of Network Camera
This time I will try to discuss the resolution of the image of the network camera. Resolution which is the number of pixels (pixel) different in each dimension that can be displayed. The greater the resolution of an image, the more have the number of dots and more detailed image will be displayed.
If you want to buy a camera network device that can display video images are detailed and clear, then you should choose a network camera that has high resolution. Currently network video camera technology has a lot to offer features Full HD resolution (1080p).But perhaps for the people of Indonesia arguably the price is still relatively expensive, because there are around 4 million more.
The following table resolution network camera.
Term
Horizontal Px
Vertical Px
Pixel
QSXGA
2560
2048
5.2MP
WQXGA
2560
1600
4.1MP
QXGA
2048
1536
3.1MP
WUXGA
1920
1200
2.3MP
UXGA
1600
1200
1.9MP
Full HD (1080p)
1920
1080
2MP
SXGA
1280
1024
1.3MP
960P
1280
720
HD
720P
1280
720
0.9MP
D1
720
480
NTSC/PAL
VGA
640
480
0.3MP
QVGA
320
240
0.1MP


Thursday, April 30, 2015

How to Setup Dual CCTV Monitors

How to Setup Dual Monitors

Using dual monitors refers to using two physical display devices to increase the viewing space running on a single computer. Microsoft Windows Operating Systems and Mac OS X now support dual and multiple monitor configurations.

Setting up dual monitors is easy. However, it requires the user to add a second video card or install a video card that can support a dual head or two separate physical outputs. The following instructions are for those with only one video card installed in their computers:-
Make sure that the computer is working fine and that it can support more than one video card. Boot in safe mode to make sure that only one video adapter and monitor is shown in Device Manager.
Next, turn off the system and install the second video card. Once installed, connect the second monitor.
If the installation is done correctly, the computer should boot the same way as always and the second monitor should still appear dark. Depending on the presence of the correct drivers bundled with the OS, drivers for the second video card may have to be installed.
Configuring Dual Monitors under Microsoft Windows
Check Device Manager. To do this, right-click My Computer then choose Properties > Hardware > Device Manager. There should be 2 monitors under the Display Adapters.

To configure the second monitor, right-click the desktop and choose Properties. Go to the Settings tab where there are two boxes, one bigger than the other. These represent the two monitors plugged into the computer. Click the second window marked “2” and change the second monitor’s resolution and color depth. Make sure that the display parameters chosen are within the monitors’ limits.

Do not forget to click the “Extend my Windows desktop into this monitor” option. If this is done properly, the 2 monitors should have the same size. Click OK and the 2nd monitor should work properly.
Troubleshooting Dual Monitor Setups
If the above instructions were followed but the second monitor is still not working, check if the operating system supports both monitors.

Also, check the kind of video card that was installed. If the computer has only one AGP slot and a PCI or ISA slot has to be used for the second video card, change the BIOS setting so that the PCI boots before the AGP display adapter.
Set up Dual Monitors Using a Splitter
In order to connect two monitors to the same computer, a VGA or DVI-D splitter can also be used, depending on the computer hardware’s specifications. A VGA splitter simply connects to a computer via a male-to-female VGA cable end. It then splits the digital signal into two parts, without compromising the quality of either part, and directs each part to its respective VGA cable end, allowing a single VGA cable to connect one computer to two separate VGA-based monitors. If a user wishes to connect more than two monitors to a computer, he/she should use a VGA splitter that uses more cable ends.
How to Display Separate Applications on Each Monitor
Although a VGA splitter connects two or more monitors to a single computer, the secondary monitor will be completely blank until the user makes the necessary changes to Windows. In order to display separate applications on each monitor:
1) Click the Start Menu and open the Control Panel.
2) Open the “Appearance and Personalization” category and select “Adjust screen resolution.”
3) Select the “Multiple Displays” menu and choose “Extend these displays.” This will activate the secondary monitor.

4) Launch the programs to be accessed and drag them to the secondary monitor. This is done by simply dragging the program window to the side of the primary monitor, causing the program to appear on the secondary monitor.

Friday, April 10, 2015

Convert VGA to TV

Convert VGA to TV

Converting VGA Video Signals
The process of converting a VGA signal to a usable TV format such as Composite Video can be done with special cables. These cables will usually have a special VGA connector as well as a stereo plug which fits into a normal headphone or sound output jack. This will then convert the video and sound data to the other end, which would be a standard RCA connector. This will compose of a Yellow video cable, a Red right sound channel cable and a White left sound channel cable. These options come in various lengths as well as “female” cable ends for devices which connect into the converter cable.
The other option to convert the VGA to TV signal is through the use of special video converter hardware. These consist of special input boxes which can convert the video data directly into the needed TV signal. The hardware boxes may have several different options for connecting to a television. This could be an RCA output, HDMI output or other options depending on the hardware. Several different manufacturers make these hardware options which could connect your PC or compliant VGA device to a TV screen.
Advantages of VGA Conversion
There are many reasons why directly converting the VGA signal can be an advantage for many reasons. The video signal can be used for various different uses. The following are benefits of converting VGA signals to TV signals:
Easy Presentations – Some companies may not want to spend on a projector and additional hardware to make presentations. By using a VGA to TV converter, connecting a notebook computer with a VGA port allows you to make a Microsoft PowerPoint presentation or display presentation videos without the use of a projector or other device. This can be very effective and much cheaper by using materials already on hand such as a television. This also tosses out obsolete hardware such as Video Cassette Players.

Watching Downloaded Video Media – Some people enjoy using popular services such as iTunes or other equivalents to purchase and play videos, movies and other media. Watching these videos on your home entertainment system is always much more entertaining than the constraints of your computer monitor. Some laptop/notebook PCs have tiny screens which make watching this type of media difficult. The use of a television is also more convenient as you are able to relax in the comfort of your living room or bedroom.

Having a Larger Display Option – Some people simply want a larger monitor screen without having to pay a large amount for a new monitor. Using a television as a monitor is also a smart option, especially if the television is fairly new but does not have the modern VGA connector for HD video devices. Gaming on a larger screen is also more enjoyable for many people who have a video card capable of rendering high end graphics that deserve a larger computer screen.

Temporary Backup Monitor – Disaster can strike at any moment and a monitor can break and become useless. If you do not have the money to purchase a new monitor right away, a VGA to TV converter option could be a useful way to have a temporary monitor to use. The TV can also be used as a larger, secondary monitor. Many people want to have a dual monitor setup without having to buy a second monitor if they have a video card which supports dual monitor connection with the original motherboard connection. This is possible through the use of a VGA to TV converter.
Disadvantages to VGA Conversion
Small Resolution Size – Since VGA output from most computers is designed to work with the resolution which the video card can support with generic monitors, it is often restricted to smaller screen resolutions. The common resolution is 640 x 480 pixels while some video cards can display larger sizes in addition to this size. Most televisions which are not modern will only be able to display the smaller sizes with older graphics cards. Modern televisions may already have VGA input on them so checking to see if it is included is a must.
Reduction in Color Output – The VGA to TV converters will most likely reduce the amount of colors which can be displayed on the television, especially on older television sets. This is simply because the conversion of the signals is not perfect and results in some loss in quality.

Slow Video Response – Some VGA to TV converters will have a low bandwidth output and will only show a certain amount of frames per second. The fewer the frames, the slower the video feed will be, which may seem less than perfect. Flickering of the screen and in some cases artifacts may occur from the feed. This is not unusual in VGA to TV converters which are designed to be a simple bridge between video data. Some software take more steps to ensure that the video quality is greater, thus reducing this unsightly side effect of VGA to TV video conversion.

Video Deformity – The output from VGA to TV may not match well enough and have either a too long or short height or width setting. This may or may not be adjustable with your television and can look awkward for some uses. The video output may not work with every television and depending on the brand, some TVs may have issues while others may not. Higher quality televisions are expected to have better results with VGA to TV converters.

Manual Sound Connection – Some VGA to TV converters are video only. This means that you must figure out a way to connect the sound on your own, purchase an additional sound cable to feed into your television or simply deal with the sound option that your PC or notebook has. This can be severely difficult to deal with and may make the connection of the video not as perfect as needed.

Additional Power Consumption – Some VGA to TV devices will require additional power to run and will take up additional power sockets or consume batteries to operate. This may not be the best option for some people who already have several devices consuming power. This may also not be as portable as needed for some applications. Either way, consuming more power will always equal spending more money over time. Rechargeable batteries also consume electrical energy when they are recharged.

Saturday, April 4, 2015

1080i VS 1080p The Difference

1080i vs. 1080p: What's the Difference?

Progressive (1080p) video is considered better than interlaced (1080i), but it's not always clear why; here's what's actually happening on your TV screen.
Today's HDTVs can display beautiful, 1,920 X 1,080-pixel video, but the actual quality of what you're viewing depends on the source material. A lot of the time, you're not seeing exactly 1080p. In fact, most TVs today have two modes with similar names: 1080i and 1080p. Both have the same screen resolution, so what's the difference between the two? Here are five things you need to know:

1080i video is "interlaced." 1080i video plays back at 60 frames per second, but that's a bit deceptive, because it's actually broadcast at 30 frames per second. The TV then displays those frames twice, the first pass is 1,920 X 540 for the even scan line field, and the second pass is 1,920 X 540 for the odd scan line field. The process by which this occurs is called interlacing. It contributes to a sense of motion and reduces perceived flicker.

1080p video is called "progressive scan." In this format, 1,920-by-1,080-pixel high-definition movies are progressively drawn line after line, so they're not interlaced. On paper, that may not seem like a huge deal. But in the real world, what you end up seeing looks sharper and more defined than 1080i, particularly during scenes with a lot of fast motion.
Sometimes 1080p is termed "Full HD" or "True HD," to distinguish it from 1080i or 720p video. Blu-ray discs contain 1080p video at 24 Frames Per Second, and then, using a method known as 3:2 pulldown, display it at 30 frames per second on screen.
Data compression can confuse the issue. Sometimes cable companies will deliver a 1080i picture, but then compress the data significantly in order to use up less bandwidth. The result can mean smeared details or pixelated color gradations in certain scenes. It's still technically HD, and still looks better than standard-definition cable, but it's not as good as it could be.
This also happens with 1080p streaming Internet video, but in that case, it's usually dependent on the speed of your data connection. In fact, Blu-ray is currently the only practical format for watching lots of pure 1080p content. Even the latest Apple TV, which supports 1080p streaming, does so in a compressed format that loses a bit of quality (although it still looks quite good).

Both formats look similar on smaller TVs. As a general rule, you need a larger TV to notice the difference between 1080i and 1080p. Depending on your eyesight, you can probably pick up the difference on a 32-inch LCD if you're particular about it. But most consumers don't really see a marked difference until at least a 42-inch screen, if not larger. In fact, many people are perfectly happy with 720p HDTV sets even at higher sizes; we recently named one, the 51" Samsung PN51E490B4F, best Choice for budget large-screen HDTVs.

1080p isn't even the best anymore. Technology never stands still, of course. Five years from now, you'll probably just want Ultra High Definition (aka 4K) video instead. (For a closer look at 4K video, check out What is Ultra HD?) But for now, if you're a videophile who appreciates a sharper picture, 1080p is definitely the way to go—both in HDTV capability and in the source material you're viewing.

Tuesday, March 31, 2015

Configure Router as Switch

How to configure router as switch?
Most likely you will ask this question if you plan to expand you home network, and you have only extra Ethernet router but not switch. At the same time you try to make use this extra router if possible without paying more on extra switch. Well… It’s pretty simple to get it done, keep on reading.

As you can see from 2 examples below, we can use second Ethernet router to expand existing wireless network or Ethernet home network, so that you can connect more computers to your network. Please note that first and second routers must be located on same network, because the second router just acts as a switch, not router anymore.


Ok. Let’s start to configure second router as switch.

1) Connect first router’s LAN port to second router’s LAN port by using a crossover cable. If one of the routers supports auto MDI/MDI-X feature, you can use either straight or crossover cable. Remember, don’t make any connection to second router’s WAN or Internet port.
2) Ok. Now assuming your first router's LAN IP is 192.168.1.1 with subnet mask 255.255.255.0, and then this will act as gateway for entire network (including the computers that connect to second router). If you would like to enable DHCP, then just enable the DHCP setting on first router and it will act as DHCP server for entire network (you don't need to enable DHCP on second router anymore). As an example, you can enable DHCP with IP range 192.168.1.2-250, subnet mask 255.255.255.0, gateway 192.168.1.1, DNS servers 208.67.222.222 and 208.67.220.220 on first router.
3) After talking about first router's configuration, proceed to log on to second router’s configuration page, then give this router an IP by configuring an IP and subnet mask under LAN setting. The IP that you configure should be located on subnet same with first router's subnet and this IP is not being used by any other device. If you have configured first router’s LAN IP and DHCP setting as shown in step 2 above, you can easily configure second router with LAN IP 192.168.1.251, 192.168.1.252 or 192.168.1.253 and subnet mask 255.255.255.0.
4) After that, don’t enable DHCP or any other settings on second router. If you have enabled DHCP or other settings, disable them. Finally SAVE all the settings. And now your have completed your mission of making second router as switch.
5) If you have computer that is configured to obtain IP automatically, connect it to other LAN port of this new "network switch", then it should be able connect to network, ping router IP and access to internet.

Sunday, March 15, 2015

Power Over Ethernet - Way to Go

Power Over Ethernet May Be The Way to Go
Power over Ethernet (PoE) is a technology that powers a remote Ethernet device by transferring electrical power over the same standard twisted-pair Ethernet cable that used to also send Ethernet data communication.
Here are some benefits to using PoE:

Simple – A single cable can supply power and network connection
Space – Only one set of wires to deal with saves space and simplifies installation
Maintenance – Easier to deal with low voltage issues
Easy –Very easy install cameras and extend your network
Reach – Supports longer camera runs with Ethernet cable (ft.)
Savings – Cost savings on many levels (installs, labor, etc)
Look into Power over Ethernet injectors or switches to assist you in transmitting electrical power, along with data, to remote devices over your network. The benefits could be endless!

There are two main types of PoE, active and passive.

  1. Active PoE is standardized by the IEEE 802.3af (PoE) and 802.3at (PoE+ which provides more power). Active PoE requires negotiation between the device and the power source. Double check if this matters, but I am pretty sure this is supported to the supported length of cable for ethernet of the particular type (100Mbps or gigabit). Active PoE is mostly the domain of enterprise stuff. It's not generally inexpensive. In general[1] you can plug a non 802.3af/at PoE device in to network port that has power being provided to on that standard and all will be fine.
  2. Typical Application

  3. Passive PoE is simplistic and simply uses a pair of the 8 wires in an ethernet cable for running power. How much power this can provide and how far the device can be from the power source varies wildly. There are some "standards" but they are by convention rather than formalized. It's generally bad (tm) to plug a device that is not expecting passive PoE in to a port that is powered as such. If you have a well designed network device, it might not fry the device, but it really shouldn't work.
In standard cat-5 cabling for 10Mbit or 100Mbit Ethernet only 4 of the 8 wires are actually used.
Power over Ethernet is a technique to use the unused pairs: (4,5 and 8,7) to carry DC power to the device.
Some devices contain the circuitry to actually be powered directly; in other cases you need to split the power off the Ethernet cabling and feed it into the equipment the normal way.
Intel, Ayaya, Orinoco, Wavelan, 3Com and Symbol use 4,5 = ground and 7,8 is positive
Cisco aironet use 7,8 = ground, 4,5 = positive.
RJ45 Pin #
Wire Color
10Base-T Signal
PoE
(T568A)
100Base-TX Signal
1
White/Green
Transmit (+)
Mode A +
2
Green
Transmit (-)
Mode A +
3
White/ Orange
Receive (+)
Mode A -
4
Blue
Unused
Mode B +
5
White/ Blue
Unused
Mode B +
6
Orange
Receive (-)
Mode A -
7
White/ Brown
Unused
Mode B -
8
Brown
Unused
Mode B -
Power over Ethernet Pinout
Same As The Straight-Through Cable Pinout for T568A
It eliminates the need for power outlets at the camera locations and enables easier application of uninterruptible power supplies (UPS) to ensure 24 hours a day, 7 days a week operation.

PoE technology is regulated in a standard called IEEE 802.3af and is designed in a way that does not degrade the network data communication performance or decrease the network reach. The power delivered over the LAN infrastructure is automatically activated when a compatible terminal is identified, and blocked to legacy devices that are not compatible. This feature allows users to freely and safely mix legacy and PoE-compatible devices, on their network.

The standard provides power up to 15.4W on the switch or midspan side, which translates to a maximum power consumption of 12.9W on the device/camera side - making it suitable for indoor cameras. Outdoor cameras as well as PTZ and dome cameras have a power consumption that normally exceeds this, making PoE functionality less suitable. Some manufacturers also offer non-standard proprietary products providing suitable power for these applications as well,but it should be noted that since these are non-standard products, no interoperability between different brands is possible. The 802.3af standard also provides support for so-called power classification, which allows for a negotiation of power consumption between the PoE unit and the devices. This means an intelligent switch can reserve sufficient, and not superfluous, power for the device (camera) - with the possible result that the switch could enable more PoE outputs.

Sunday, March 8, 2015

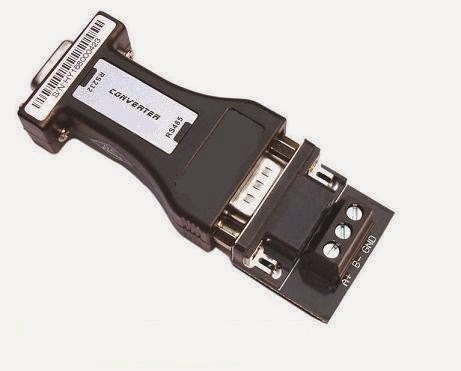
RS422, RS485, comparison with RS232

RS232 is well-known due to popularity of today’s PC’s, unlike the RS422 and RS485. These are used in industry for control systems and data transfers (small volumes, less than hundreds of Mb/s).
So, what is the main difference between RS 232 and RS 422 & 485? The RS 232 signals are represented by voltage levels with respect to ground.

There is a wire for each signal, together with the ground signal (reference for voltage levels). This interface is useful for point-to-point communication at slow speeds. For example, port COM1 in a PC can be used for a mouse, port COM2 for a modem, etc. This is an example of point-to-point communication: one port, one device. Due to the way the signals are connected, a common ground is required. This implies limited cable length? About 30 to 60 meters maximum. (Main problems are interference and resistance of the cable.) Shortly, RS 232 was designed for communication of local devices, and supports one transmitter and one receiver.
RS422 & 485 uses a different principle: Each signal uses one twisted pair (TP) line-two wires twisted around themselves. We’re talking ‘Balanced data transmission’, or ‘Differential voltage transmission’. Simply, let’s label one of the TP wires ‘A’ and the other one ‘B’. Then, the signal is inactive when the voltage at A is negative and the voltage at B is positive. Otherwise, the signal is active, A is positive and B is negative. Of course, the difference between the wires A and B matters. For RS 422 & 485 the cable can be up to 1200 meters (4000 feet) long, and commonly available circuits work at 2.5 MB/s transfer rate.
What is the difference between RS 422 and RS 485? Electrical principle is the same both use differential transmitters with alternating voltages 0 and 5V. However, RS is intended for point-to-point communications, like RS 232. RS 422 is intended uses two separate TP wires, data can be transferred in both directions simultaneously. RS 422 is often used to extend a RS 232 line, or in industrial environments.
RS 485 is used for multiply-point communications: more devices may be connected to a single cable- similar to e.g ETHERNET networks, which use coaxial cable. Most RS 485 systems use Master/Slave architecture, where each slave unit has its unique address and responds only to packets addressed to this unit. These packets are generated by Master (e.g PC), which periodically polls all connected salve units.

Quick Comparison Chart:

Friday, February 27, 2015

Choose an HDMI Cable

How to Choose an HDMI Cable

Choosing an HDMI cable can be a complex task. There are several factors that must be considered in order to select the best HDMI cable to meet the user’s requirements:
·         HDMI standards compliance
·         HDMI Cable Categories
·         Cable length
·         Cable quality
·         Active cables
·         HDMI devices
·         Price

HDMI Standards Compliance
Each HDMI cable is rated to comply with a specific revision of the HDMI standards. A cable rated for HDMI 1.2a should meet the requirements of HDMI 1.0, 1.1 and 1.2, but is not guaranteed to meet the standards for HDMI 1.3.
HDMI Cable Categories
The HDMI standards define two cable categories. Category 1 HDMI cables support HDTV resolutions and frame rates. Category 2 cables are required for higher resolutions or higher frame rates.
Cable Length
The HDMI specification does not define a maximum cable length. HDMI cables are commonly available in 3′ to 50′ lengths.
Purchasing a cable longer than necessary will cost more money, but it will also increase signal loss due to attenuation.
Cable Quality
All other factors being equal, a cable that is built to higher tolerances using better materials will outperform a cable that is built merely to meet a standards specification. In addition, these premium cables will often provide longer service lives.
An HDMI cable can be made using 28 AWG wire, but a 24 AWG wire will create a sturdier cable that is more resistant to attenuation.
As with traditional analog stereo cables, premium HDMI cables are often furnished with gold plated connectors to ensure the best possible signal quality.
Active Cables
For specialized high end applications, some manufacturers are selling active HDMI cables. These cables use a variety of technologies that involve boosting the transmission distance or quality through the addition of electrical power to the cable connection.
Some of these active cables run over fiber optics or Cat-5 cable.
HDMI Devices
Another approach to supporting extremely long cable runs is to chain multiple HDMI cables together with amplifiers, repeaters, or equalizers.